Let's get back to some work related tasks...
Sorry this is so basic for LEAKOIL veterans, but some 101 stuff is sometimes in order. One thing I wanted to focus on for novice mechanics like me, is the upper bolt engine install challenge. This is especially true when doing solo engine installs.
Just so we start with the basics, whether you have a type I style "upright" or a "pancake" style type IV in your bus, they are both held in place by four (4) stud-bolts/nuts. (NOTE: Some early bays have a "moustache" bar under the engine for support, and "pancakes" also have a support system, but here we're only dealing with the studs/bolts/nuts.)
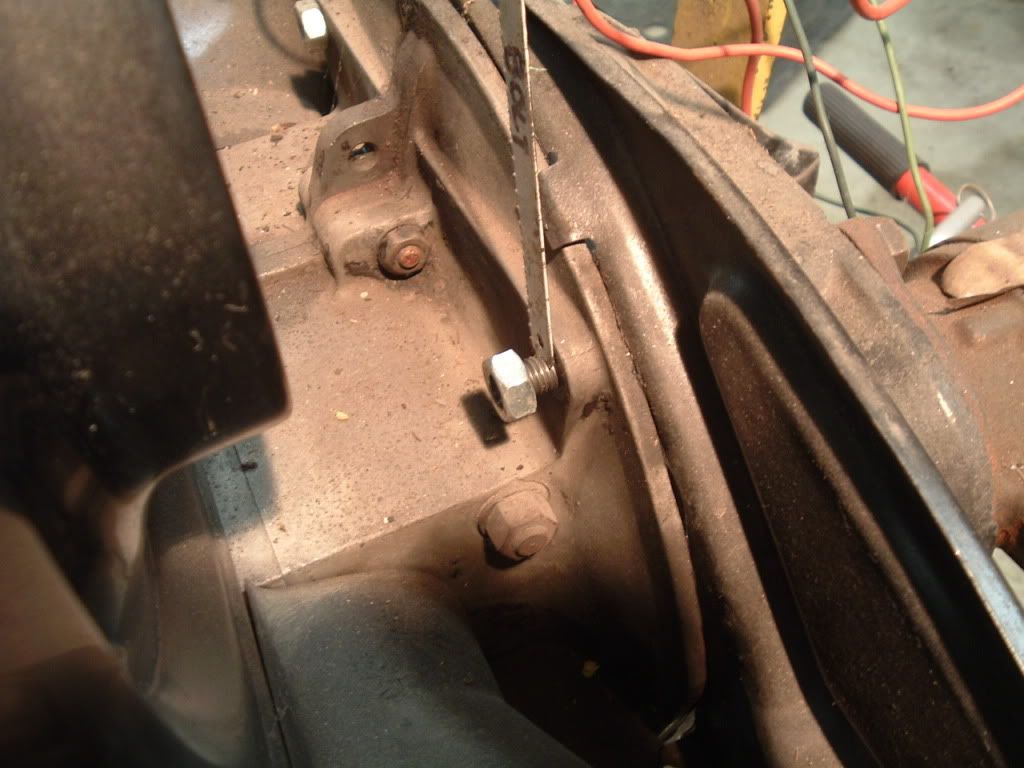
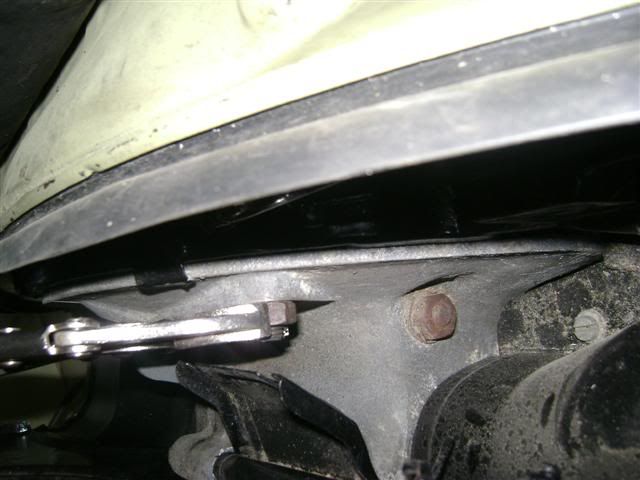
If you look closely at the photo below you will see where the four mounting points are located on the VW trans. If you think of a clock, they are at approximatly 10:30AM, 1:30PM, 4:30PM & 7:30PM. Do you see the holes in the trans housing? The lower two points, 4:30PM & 7:30PM, are filled by threaded studs that are sticking out of the engine block. Thus, when you mate the engine to the tranny these studs will line up wth the two lower holes in the tranny. When you push the engine in, the studs will pass through the lower holes and they will then be bolted in by 17MM nuts on the opposite side of the tranny. Hopefully, if you have nothing blocking you, these are pretty easy.
Now the top bolts/nuts are a bit of a challenge. First off, there are no threaded studs in the engine block for these holes. These are bolts that are inserted from the opposite side of the trans from what you see in the photo above. After being inserted, these bolts pass through the engine block holes at the 10:30AM & 1:30PM locations going backwards in the direction of the back of the bus. These are then bolted in by using nuts that are screwed onto these bolts from the inside of the engine compartment behind the fan shroud! Get it?
Thus, the bottom fixed studs are bolted on what is the front side (front is front) of the tranny and the top bolts are inserted twords the back of the bus through both the holes in the tranny and the engine block and are then bolted on from the inside of the engine compartment, (back is back).
This is tough. The problem you face is that neither upper point is easily accessible without a lift, and with respect to the passanger upper bolt, it also serves as the upper bolt for the starter. Thus, you can't see the upper bolt lying on your back!
If you try to put the bolts in and then just screw on the nuts you will find the two bolts will just turn endlessly and never really come together. You need to hold one in place to tighten them up. Here is one method....
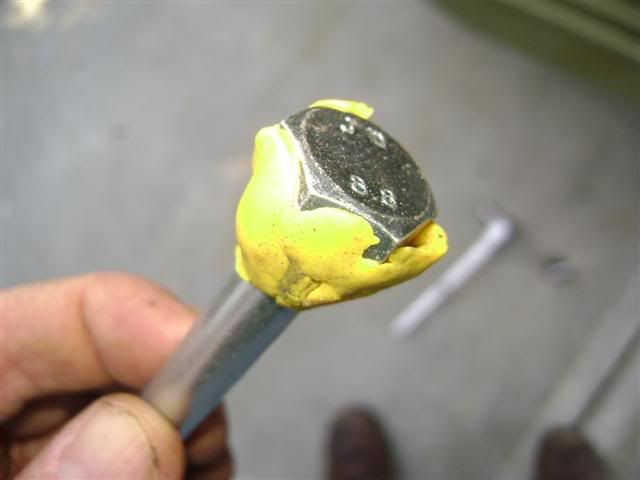
My kid stopped playing with playdough years ago, but now I'm back on it. If you get some playdough or something else you can stick the bolt in place so it will hold while you reach into the engine compartment and get the nut on the other side started. It works. Just get it started. The putty isn't strong enough for you to tighten it all the way down. For that, we need something to hold the bolt in the engine comaprtment in place. Here is one method...
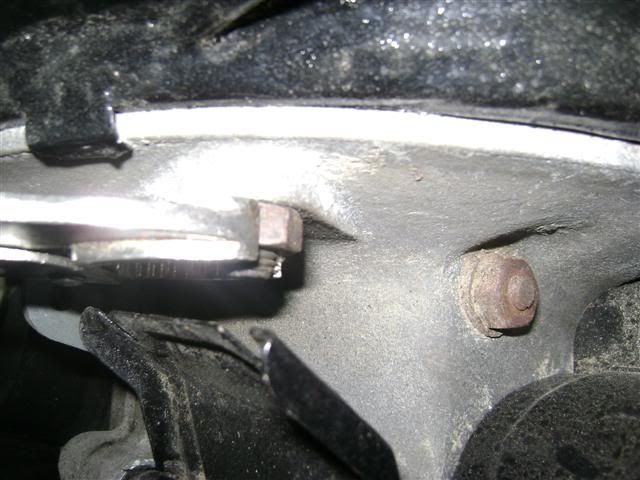
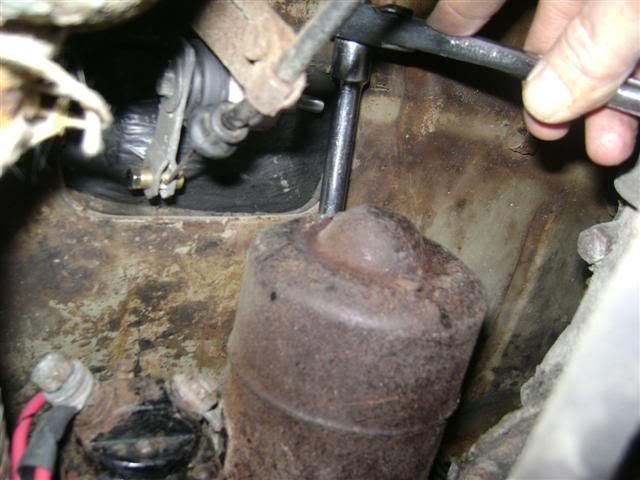
What you see here is the inside of the engine compatment from behind the fan shroud where the nut is put on the upper bolt. You can see the nut is started, but then a set of vice grips are attached to the nut so when you go underneath with your 17mm ratchet on the bolt head you can crank away and the nut won't turn once the vice grips come into contact with something and stops moving.
Here's a bigger view...
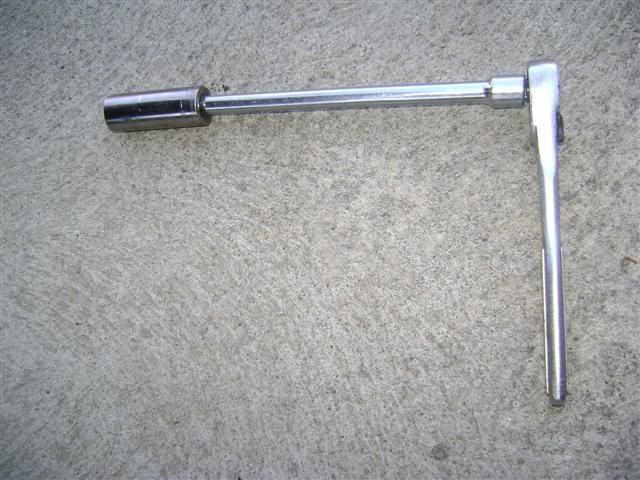
The real challenge on the starter side is gettng up there on the top of the starter and finding the unseen bolt so it can be tightened down. Here's how the effort looks...
You can see the chrome extension bar above the starter seeking the bolt. Here is the set up that you need. 17MM w/ 3/8 drive and 6" extension.
I hope this helps other novice mechanics like me. Be pateint, This only takes some veteran LEAKOILERS twenty minutes. The whole thing took me two hours.
In the end, you'll know that no matter what the problem is, you can remove and re-install your engine by yourself.