CKWA/KWHA Part II

Six Volt
Posts: 3727
Joined: Mon Dec 15, 2008 7:25 am
Contact:

Re: CKWA/KWHA Part II

Post by Six Volt »

Ken wrote: What kind of master cylinder did you end up using?
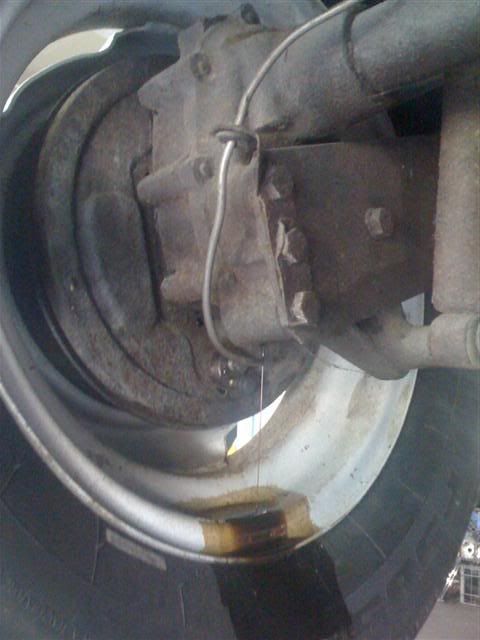
I went with the "Varga" unit, Brasilian, (I think). I also bought the "CSP" (German) conversion kit which included the spacer and resevoir you see in one of the photos above. With that, the resevoir cap matches up to the hole in the floor. You can also use an old Rabbit or Volvo resevoir, if you can find one. I'm told they will fit. The kit also has the new rubber insets for the resevoir on top of the MC. If you're not going to disc brakes, you can also do what Toolbox recomended and get a '67 splitty dual from Ronnie in Az.

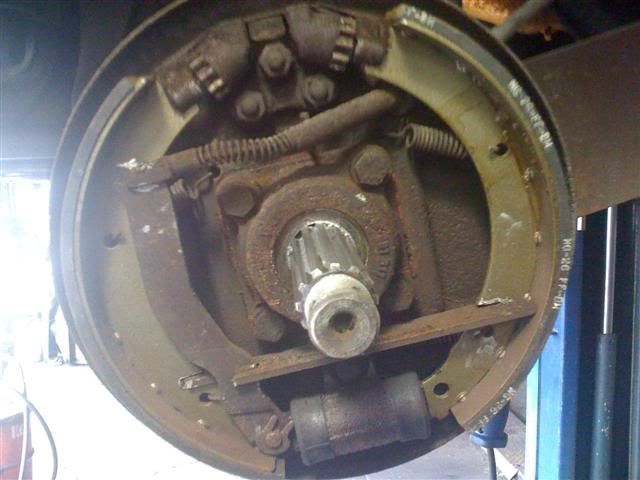
I go the new stainless lines from WW. You still have to bend them. These old buses have four, yes four, wheel cylinders in the two front wheels! :o Not sure when they changed to one per side?

I don't kinow when I'll be able to afford or justify the disc conversion kit, ($1,500.00 :shock: ), but I'll be set up for it now.
Ken wrote: I would like to visit Dale's place and meet him, what is the address?
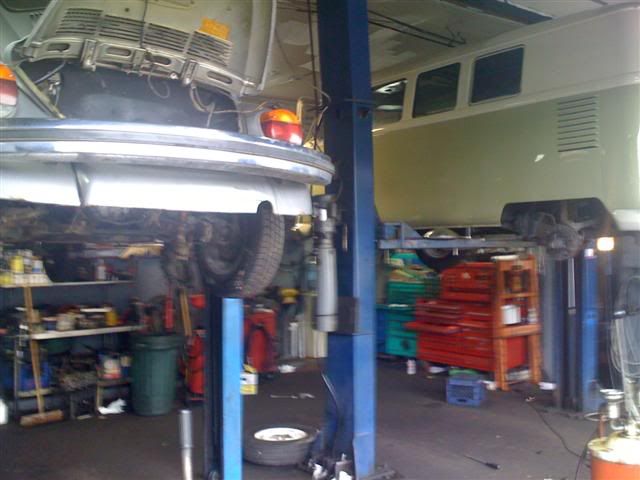
It's on the east side of State Rd. a little north of I-480. I think the address is 4421. He's not 'too chatty' if he doesn't know you, but let me know if you're ever in the neighborhood and I'll stop over and introduce you.

Dale has been good to me over the past few years. Besides, I like old car places that aren't all 'dolled up'.
toolbox
Posts: 905
Joined: Thu Dec 18, 2008 2:58 pm
Contact:

Re: CKWA/KWHA Part II

Post by toolbox »

Six Volt wrote:These old buses have four, yes four, wheel cylinders in the two front wheels! :o Not sure when they changed to one per side?
Fronts had 4 WC's till the change to disc brakes.
WideFive
Posts: 1270
Joined: Tue Dec 16, 2008 6:00 pm

Re: CKWA/KWHA Part II

Post by WideFive »

...
Last edited by WideFive on Mon May 09, 2011 4:50 pm, edited 1 time in total.
"There is no restoration process that can give a car legitimacy equal to originality."
toolbox
Posts: 905
Joined: Thu Dec 18, 2008 2:58 pm
Contact:

Re: CKWA/KWHA Part II

Post by toolbox »

WideFive wrote:
Six Volt wrote:Not sure when they changed to one per side?
They never did :lol: Late wc's ('64-'70) are a lot cheaper though.

Ronnie had some fronts for my 59 that were $15 each. Came in a white box with no markings. Pulled them apart to inspect before install and they looked great inside. Been on for about 5 years with no issues. The next set I will have stainless inserts installed by Whitepost.
Six Volt
Posts: 3727
Joined: Mon Dec 15, 2008 7:25 am
Contact:

Re: CKWA/KWHA Part II

Post by Six Volt »

toolbox wrote:Ronnie had some fronts for my 59 that were $15 each. Came in a white box with no markings. Pulled them apart to inspect before install and they looked great inside. Been on for about 5 years with no issues. The next set I will have stainless inserts installed by Whitepost.
The ones at WW are very exspensive. I had three of the four I needed for the front in old boxes that I found inside the bus. They were sitting there for at least 12 years, probably longer. Two of them worked, one leaked, which required a tear down and rebuild after the fact. :( The fourth one involved the use of a Varga rebuild kit for one of the originals, that worked. Bill got me two new rears WC's, so we were good to go there. The shoes were in surprisingly good shape. It was like they were changed, then the bus was parked. We replaced all the lines, used sylicone fluid and cleaned everything up. I now have brakes. :D

Hit Cedar Point with Mrs. G and Junior. Scouted out the Island. Looks like it's ready for us. Got to try out the CP idea of "air-cooled". They need to put bus bodies on those things to make them "correct"! :lol: Here are a few pics...

The rear brakes as we found them...
Image
Besides Bill's or Emil's in Streetsboro, how many shops do you see that have two air-cooled VW's in the bay area?
Image
Part of the Cedar Point air-cooled fleet...
Image
I went in for a beer to get out of the sun and heat, but Jr. had to join the "show" for YMCA, (or some other dumb song! :lol: )...
Image
I think the island is ready for us...
Image
WideFive
Posts: 1270
Joined: Tue Dec 16, 2008 6:00 pm

Re: CKWA/KWHA Part II

Post by WideFive »

...
Last edited by WideFive on Mon May 09, 2011 4:50 pm, edited 1 time in total.
"There is no restoration process that can give a car legitimacy equal to originality."
Six Volt
Posts: 3727
Joined: Mon Dec 15, 2008 7:25 am
Contact:

Re: CKWA/KWHA Part II

Post by Six Volt »

Having a lift is something we could all enjoy. 8-)

I really have to thank Dale at Dale's VW for all the time, assistance, and frankly work, he did to get this thing mobile. Once I got it down to his place there were a lot more things that needed to be done than just slapping brakes on it. Dale really helped me and I learned a great deal. In addition to all the brake work, Dale helped me, or finished on his own, the following. (Believe me, Dale really did all the hard work.)

1. Drained and replaced the rgb, tranny and steering box fluid.
2. Fixed the horn
3. Got the headlights in order, but now they're acting up again 'cause of something I did. :?
4. Got the parcel tray installed
5. Adjusted the clutch and the clutch pedal.
6. Adjusted the cab doors
7. Replaced the cab door handles ($55 each (ouch :( ) from WW.
8. Replaced the steering damper.
9. Replaced the speedometer cable
10. Bolted up all the bumpers properly
11. Greased the front end
12. Check the front end for any play and adjusted everything

I've still go more on my plate...

1. Get the curtains together
2. Finish installing the rear table
3. Install rear seats when Bill is ready
4. Fix the headlights :lol:
5. Clean up the front floor for the new WW floor mat
6. Install sconce lights
7. Install jammin' 6 volt am radio!
8. Install door/kick/roof panels in cab I got from WW.
9. Get 12 volt aux battery installed
10. Replace current outer plug with something safe. :lol:
11. Rewire the 110 units in the back w/ romex
12. Repaint the rims that I spilled lacquer thinner on! :shock:

19mm to remove top and bottom rgb bolts.If you're not lazy like me, remove the tire so you don't make a mess.

Image

I'm sure you folks are tired of my pics and my "blah blah blah", but all of you fellow LEAKOILERS have been a source of not only help, but inspiration and encouragement. I owe you all big time. I finally got real plates on it today and now it's home and fully mobile. If I find my real camera, I'll post some better pictures than these crappy phone pics. There are plenty of errors I made along the way, but it's now a good driver. :D

Image
Image
Image
Image
User avatar
abuspilot
Posts: 129
Joined: Sun Jan 18, 2009 7:51 pm
Contact:

Re: CKWA/KWHA Part II

Post by abuspilot »

Hey Sean,
The bus is looking great and I'm pretty sure I can speak for must everyone here (we love seeing the pictures) Keep'm coming and I look forward to seeing the bus.
User avatar
Ron
Posts: 276
Joined: Tue Dec 16, 2008 6:33 pm
Contact:

Re: CKWA/KWHA Part II

Post by Ron »

Looks great! Now it is time to drive it and enjoy it after all your hard work.
Image
User avatar
Howie
Posts: 1979
Joined: Sun Jan 18, 2009 10:30 am

Re: CKWA/KWHA Part II

Post by Howie »

Impressive!!! 2X what Ron said.
Howie
‎"...the ones in love with the night, they light up like a cigarette." -Jack Kerouac
Post Reply

Who is online

Users browsing this forum: No registered users and 0 guests