Yea you guys are probably right. I just put them up like that because of leaks.slayer wrote:vw7266 wrote:nice work...Ive alwasy been told not to put the axle boots the way you have them.
Ive always heard you were supposed to put the seam where they meet on the side not on the top.
But everyone has an asshole I mean opinion
I believe you are correct..like 2 a clock or 10 a clock!
I also have an a$$h@!e, i mean an opinion!
1957 Oval
Re: 1957 Oval
Re: 1957 Oval
10 oclock towards the front and don't tighten the clamps till you get the trans installed. The cheap Empi boots have lasted longest and leaked the least for me.Six Volt wrote:Yea you guys are probably right. I just put them up like that because of leaks.slayer wrote:vw7266 wrote:nice work...Ive alwasy been told not to put the axle boots the way you have them.
Ive always heard you were supposed to put the seam where they meet on the side not on the top.
But everyone has an asshole I mean opinion
I believe you are correct..like 2 a clock or 10 a clock!
I also have an a$$h@!e, i mean an opinion!The good news is I can fix them right next year since all this "new" rubber is so crappy they'll be falling apart by then!
Re: 1957 Oval
Thanks for the help guys. Good information is always appreciated.
I'll see if I can fix them. I'll probably grab new end clamps to do it right. Finished cleaning it up last night.
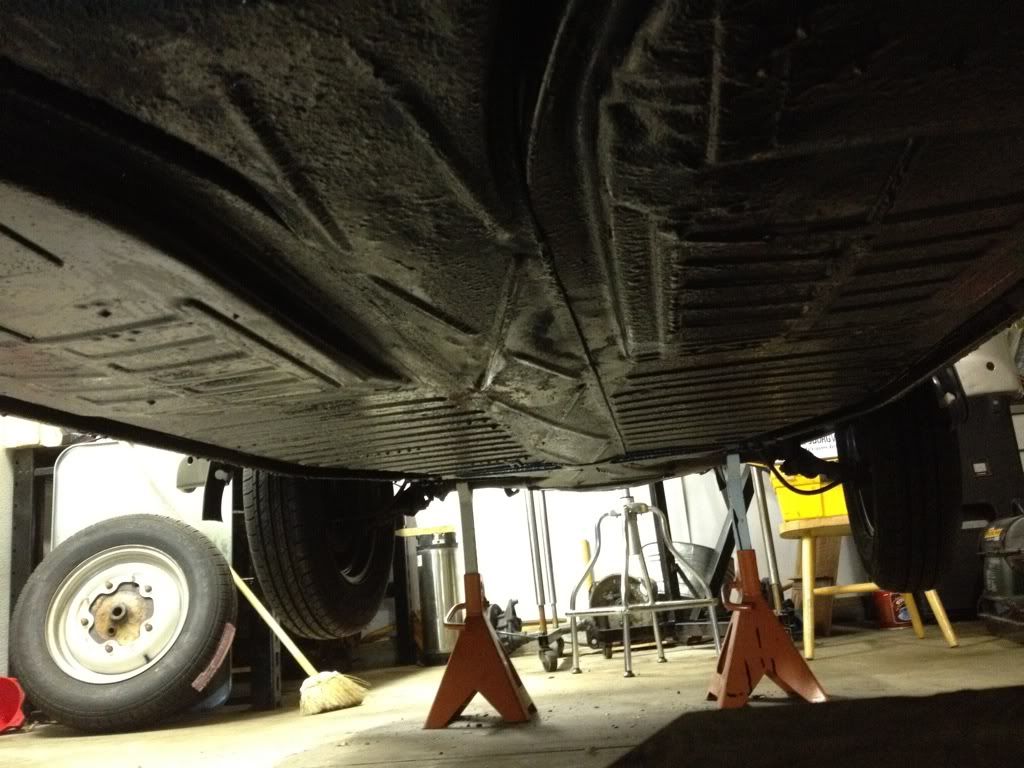
I really wanted to get the undercarriage area cleaned up.
So now I've got another issue. When I went to mount the front mount on the nosecone I discovered the 17mm nut doesn't provide the clearance needed on one bolt to tighten it. Widefive told me those probably take a 15mm nut head on 10mm stud. The last guy must have went with 17mm, so that's what I grabbed from ACE hardware. I'm wondering if any local places will carry 15mm head nuts for 10mm studs???
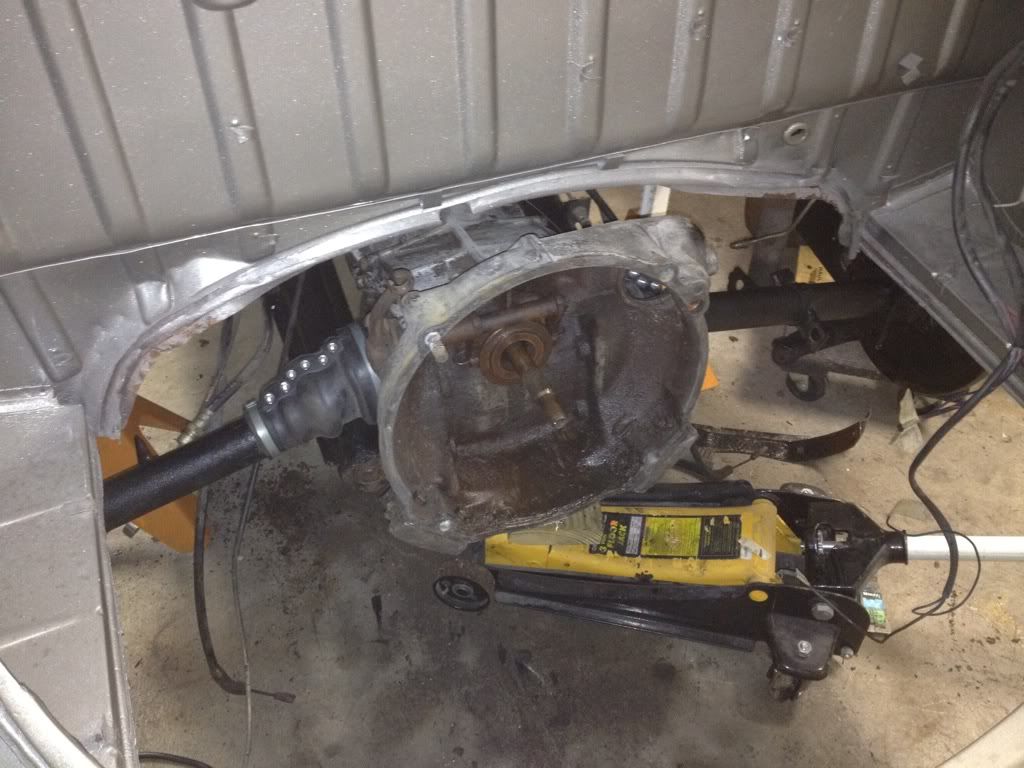
We'll the good news is everything seems to fit well. Just need to "10 o'clock" the boots and get the right hardware for the bolt in. Yes that housing will get cleaned and that throwout bearing is coming out.
I'll see if I can fix them. I'll probably grab new end clamps to do it right. Finished cleaning it up last night.
I really wanted to get the undercarriage area cleaned up.
So now I've got another issue. When I went to mount the front mount on the nosecone I discovered the 17mm nut doesn't provide the clearance needed on one bolt to tighten it. Widefive told me those probably take a 15mm nut head on 10mm stud. The last guy must have went with 17mm, so that's what I grabbed from ACE hardware. I'm wondering if any local places will carry 15mm head nuts for 10mm studs???
We'll the good news is everything seems to fit well. Just need to "10 o'clock" the boots and get the right hardware for the bolt in. Yes that housing will get cleaned and that throwout bearing is coming out.
Re: 1957 Oval
I think this is what I'm looking for. http://www.bugparts.com/cylinder-head-nut-10mm
Just wondering if anyone knows if they're available at traditional big box stores?
Just wondering if anyone knows if they're available at traditional big box stores?

Re: 1957 Oval
Don't you have any laying around with all those engines you have that you could use? If you don't, I am sure that I do! I can get you one tomorrow if you need one!
Re: 1957 Oval
Thanks Josh. I'm sure I've got them. I just don't want to have to look!Josh wrote:Don't you have any laying around with all those engines you have that you could use? If you don't, I am sure that I do! I can get you one tomorrow if you need one!
Chuck put me through the metric bolt/nut training academy last year and I still remember a few things.
Tomorrow is Daytona, so I've got to keep my eye on a TV while I work. Can't miss the usual wreck or two!
Re: 1957 Oval
Wasted yesterday afternoon waiting for Daytona. Should have been working on the bug, but that's life. Had a couple hours after work tonight so I decided to get the front and rear mounts sorted out. No big deal on the front mount I found a 15mm head nut to go on the 10mm nosecone studs so that issue was resolved painlessly. The back mount was a different story.
You may recall last fall Chuck Spence stopped by and pointed out to me that before I did anything else with the car, I better straighten out the rear trans carrier bracket and find out "Why it was so*&^% up".
Being a novice, I didn't see it or even appreciate what was wrong. It was as if the whole car was dropped on something with the transmission case taking the brunt of the hit.
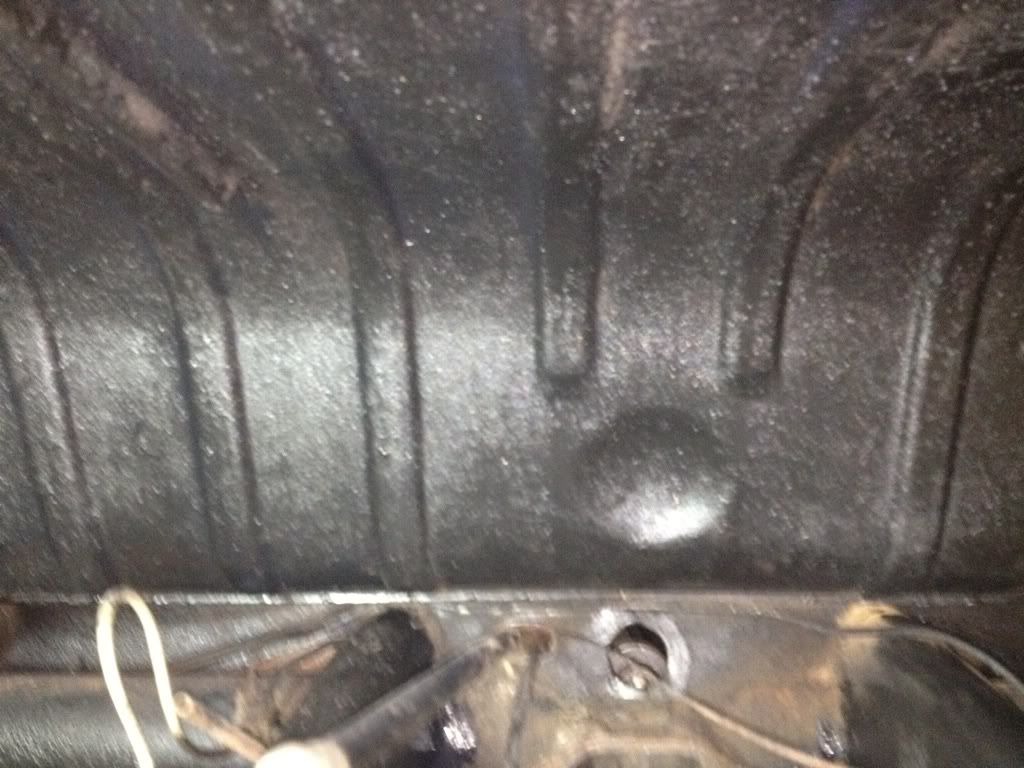
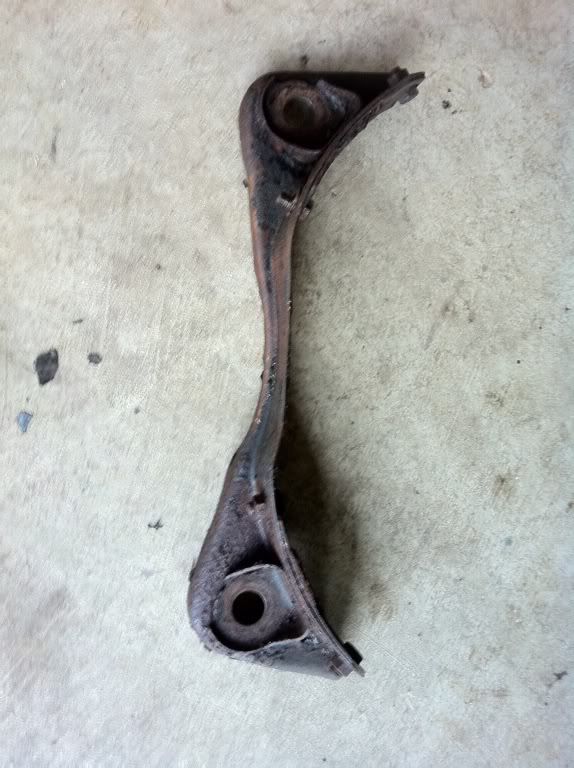
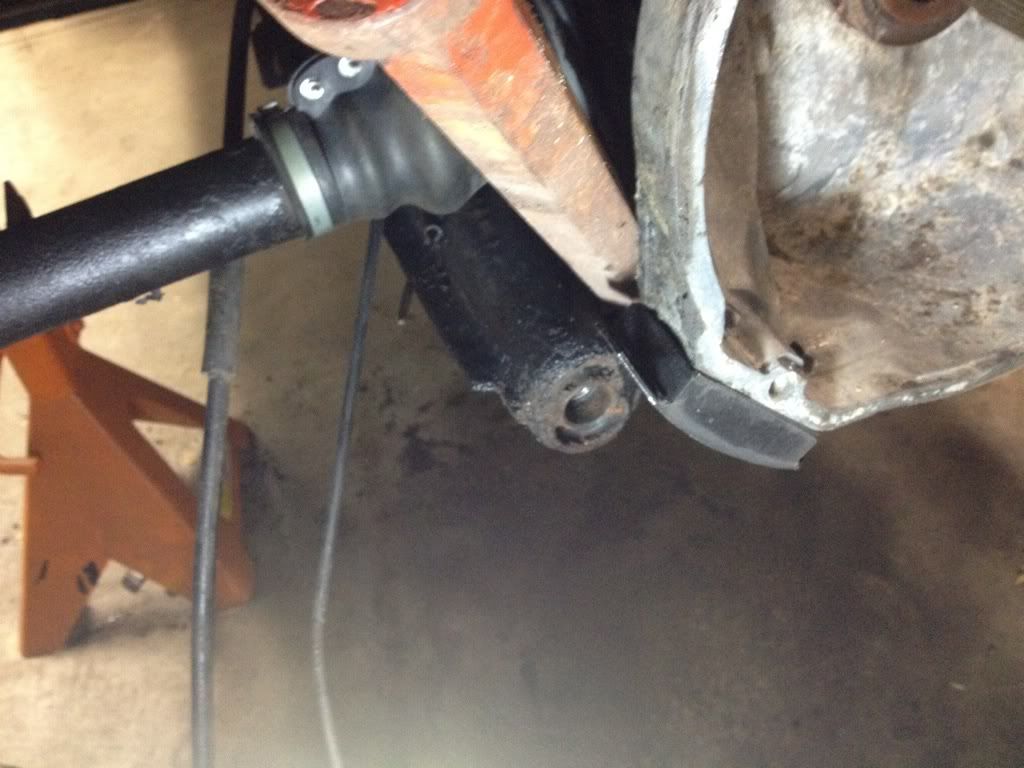
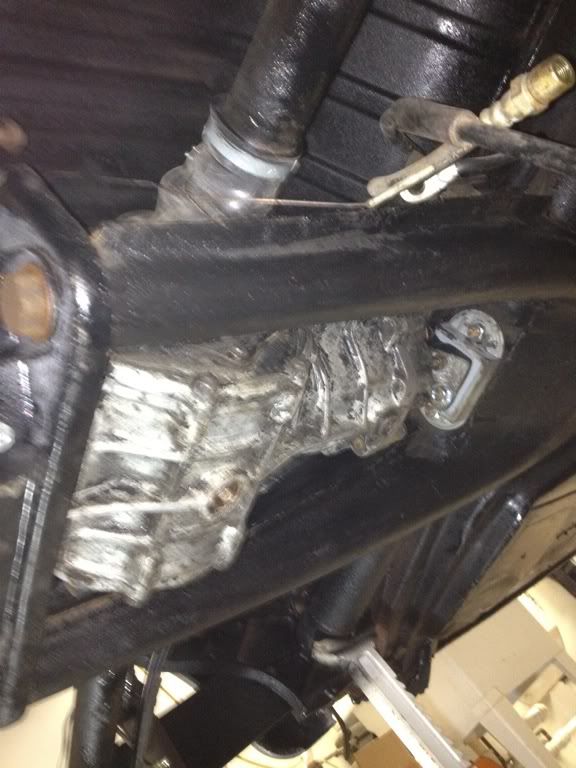
Here's what Chuck pointed out to me last year. You can see how the bottom of the carrier bracket between the two big bolts is bent upward. It's supposed to be straight across. You can also see how this caused the two rear rubber mounts to separate from the bolts and housing holding them to the carrier.
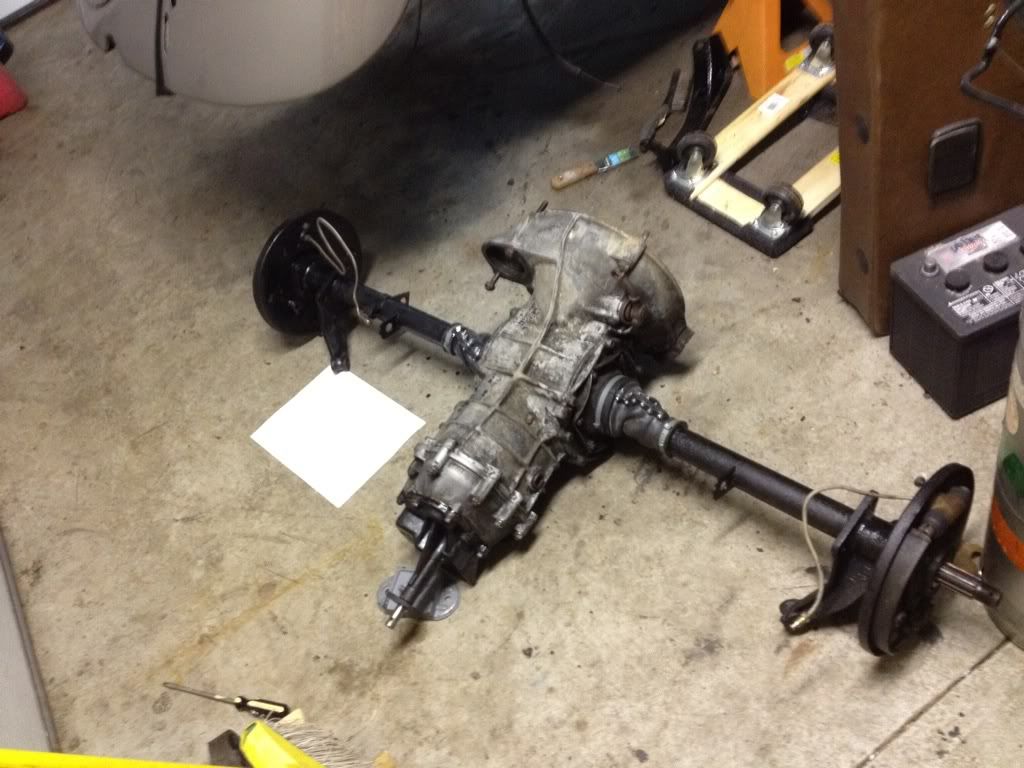
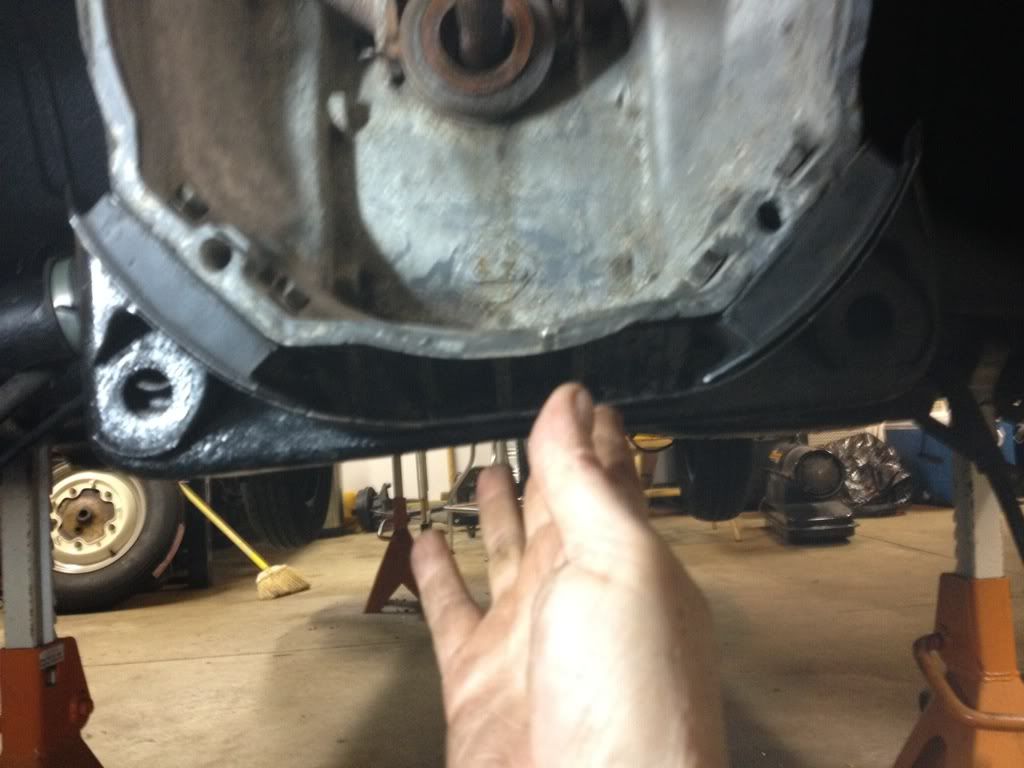
You can really see how bent it was here after I got it out.
After I pounded it all back into shape, I thought it would fit no problem, but tonight I encountered this.
I thought the main forks were bent, but I realized even with a pry bar that wan't the case.
I kept measuring, but kept getting frustrated.
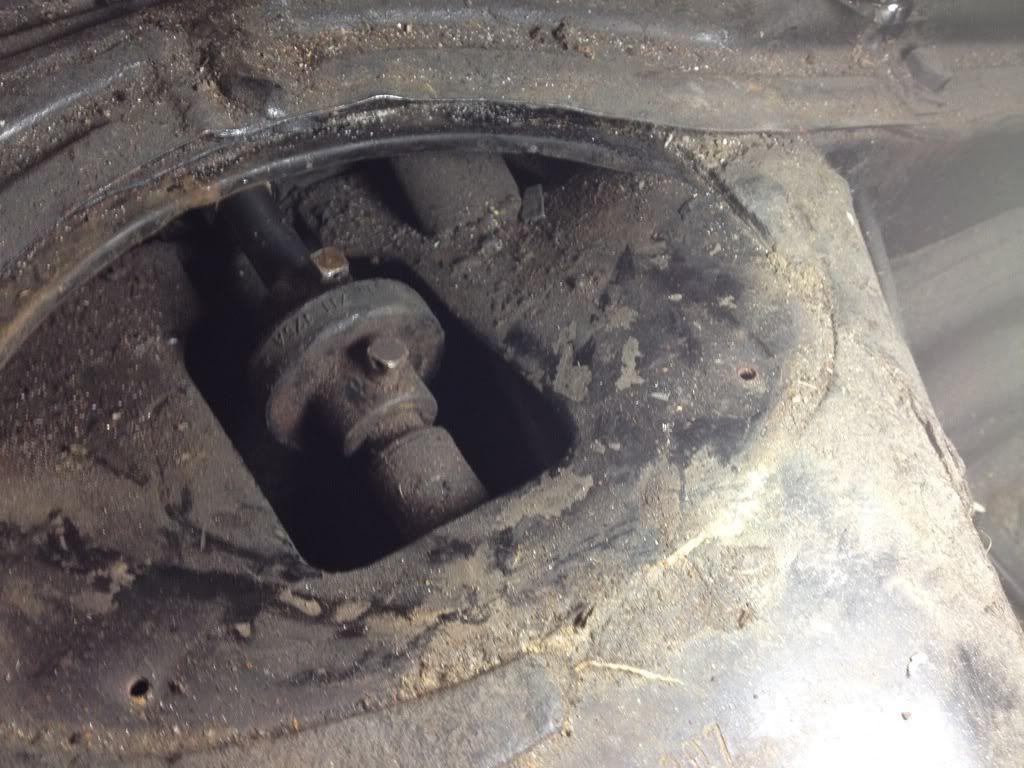
After searching the samba, I discovered there is a sequence to follow when tightening down all the bolts on all the mounts. First the front mont bolts get tightened, then the two big main carrier bolts, then the outer two rear mont bolts and lastly the nuts inside the transmission bell housing. When I raised the tranny one inch and followed the tightening procedure, it all came together.
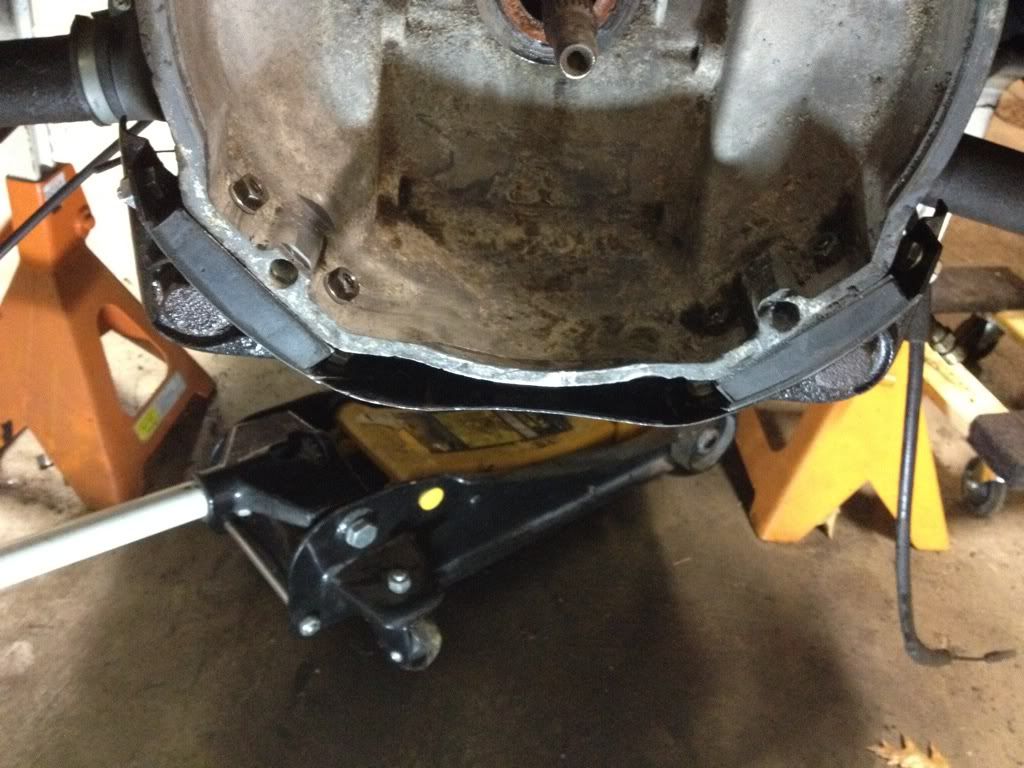
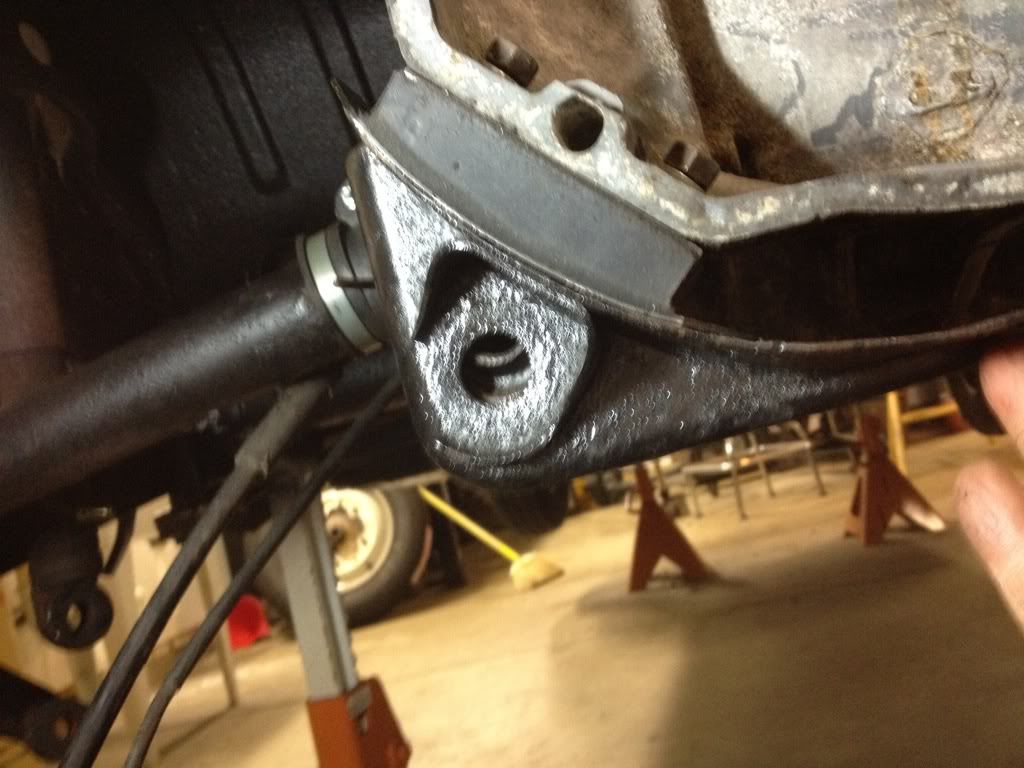
You can see how that carrier is now straight at the bottom.
Here's the new front mount all bolted in and tight.
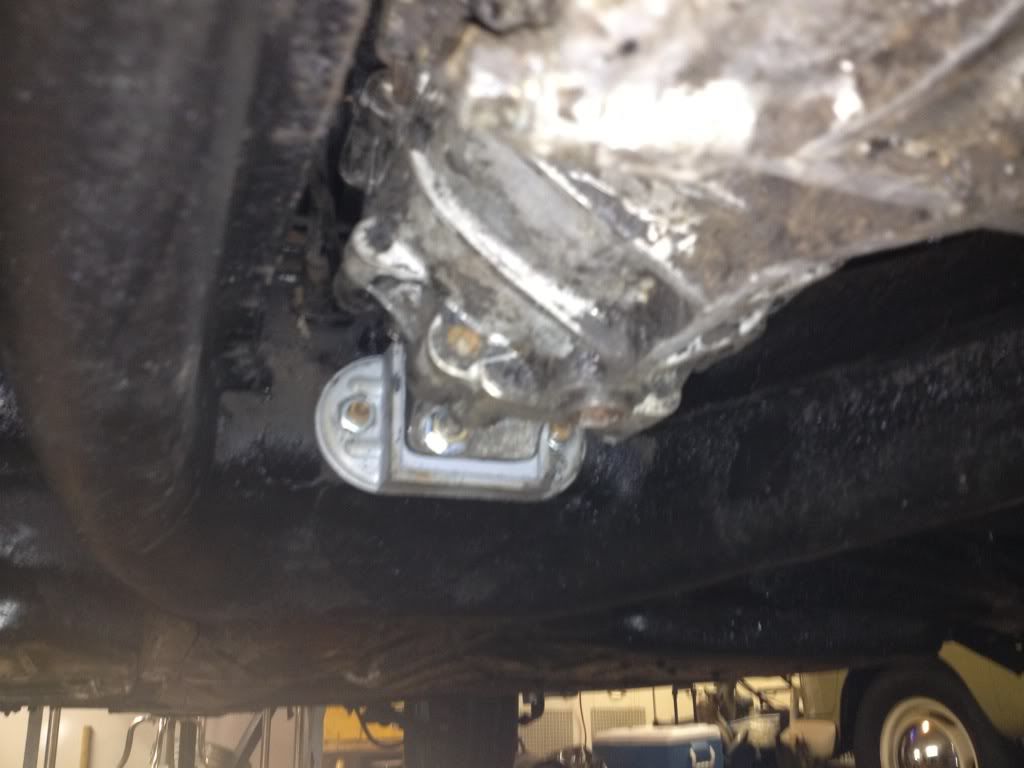
So I still have to connect the coupler inside the car, but this part all came together tight and fits nice.

Here's a couple Q's for you experts.
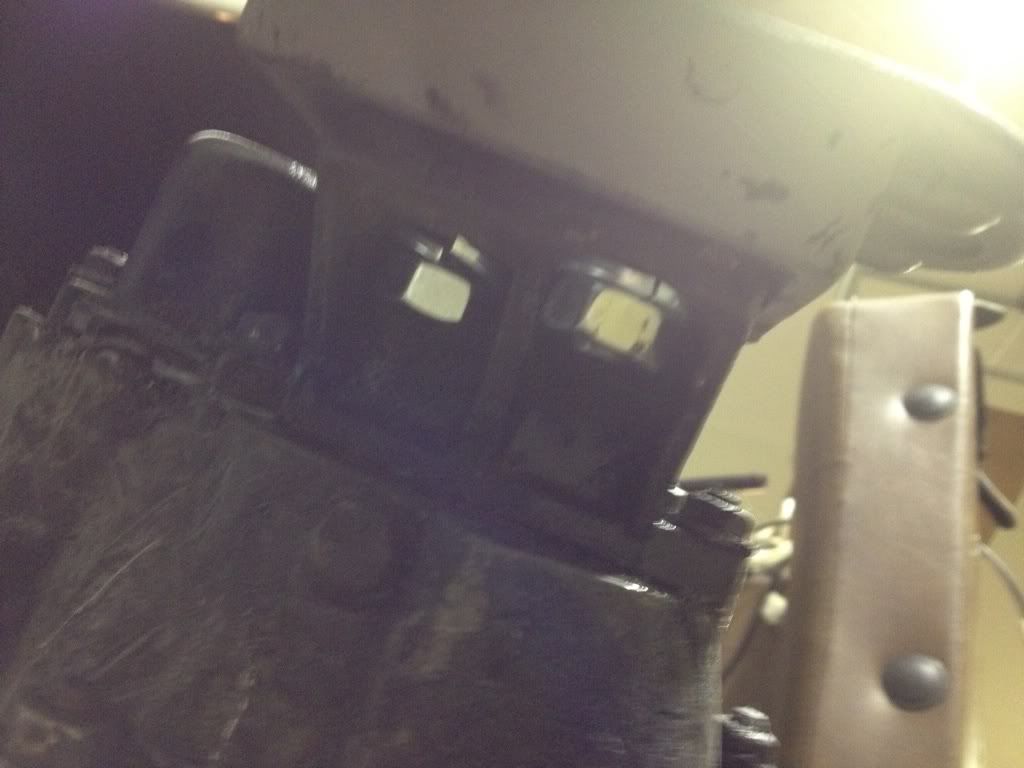
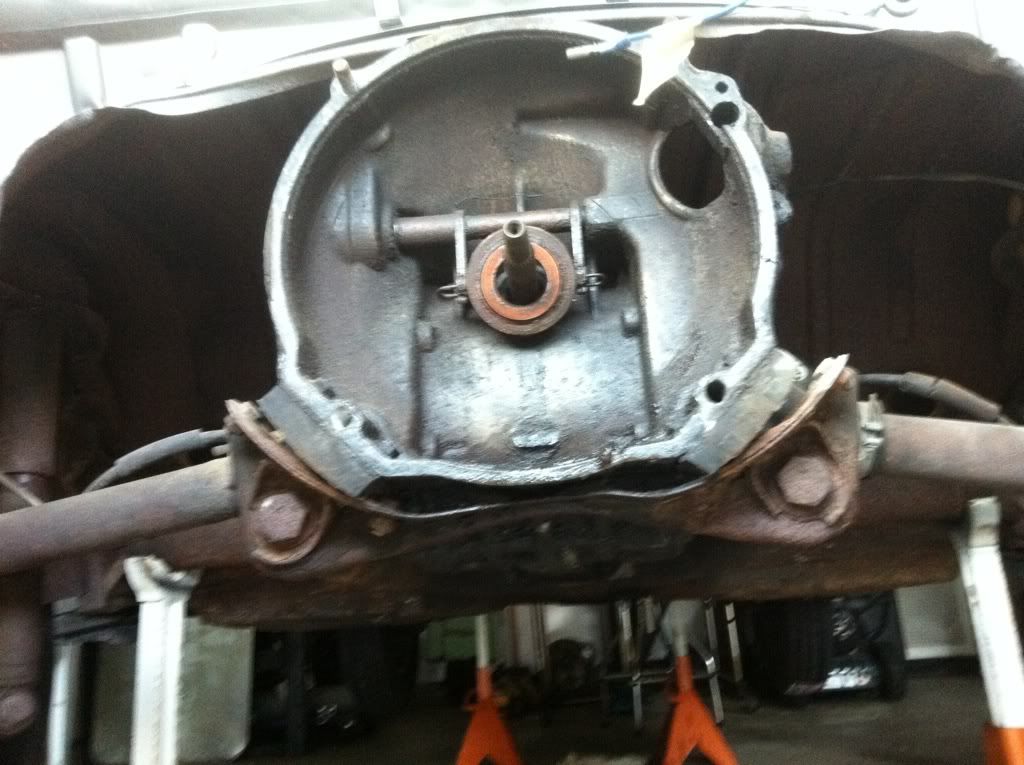
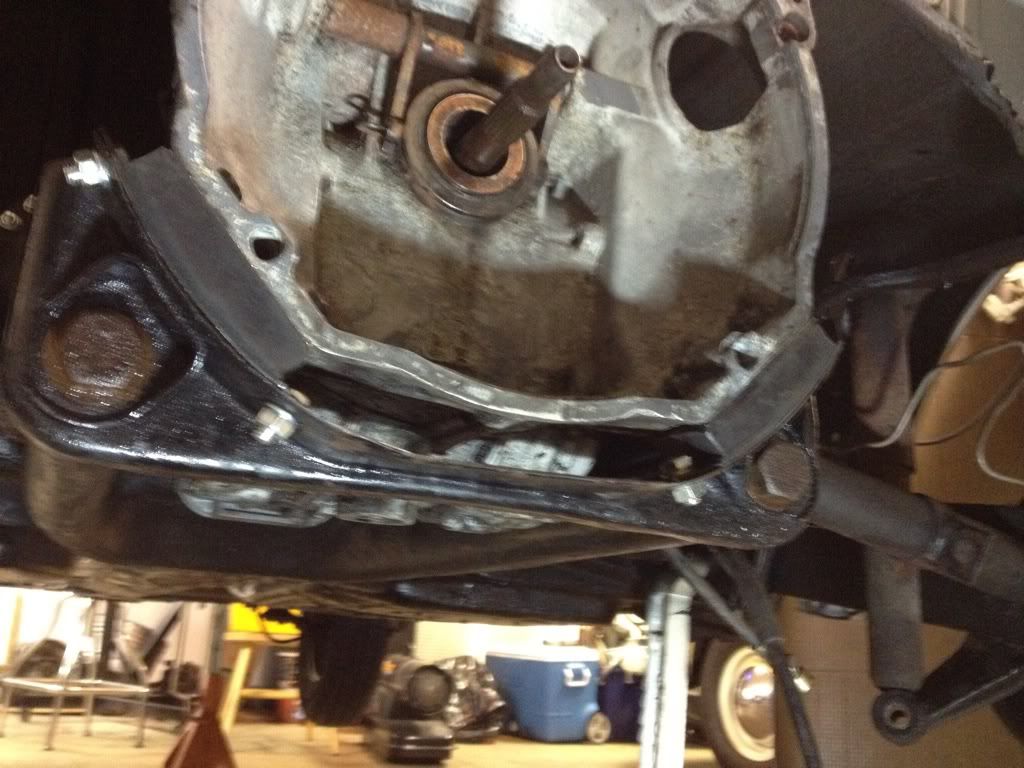
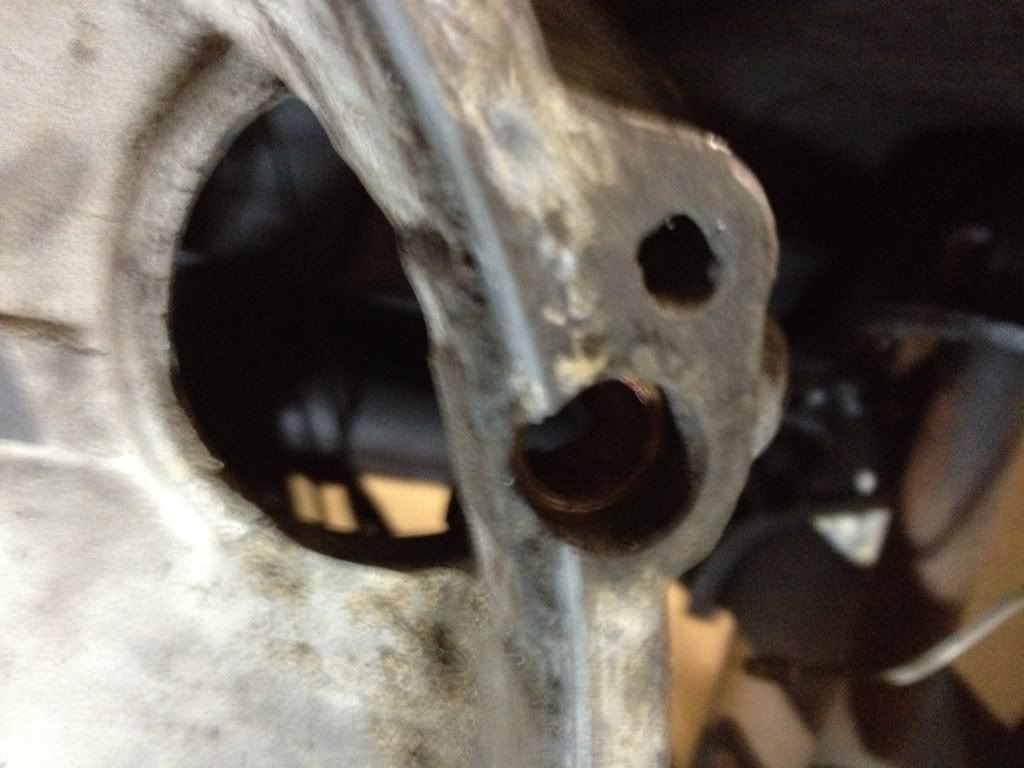
I changed the starter bushing and I'm not sure if i have it pounded in right. Does it come back more or sit right here? It's flush on the other side.
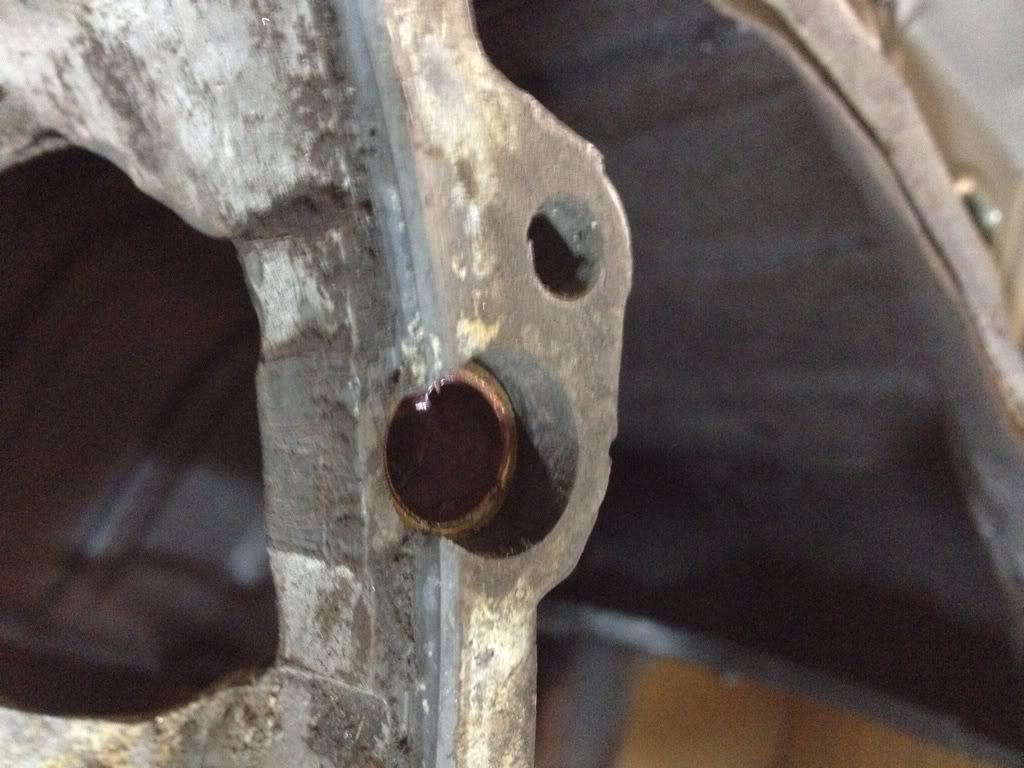
Another shot.
I've also got to learn how to replace this throwout bearing. I read a lot of complaints about clips coming loose or people having to add wire to hold them. I'm going to get a new German bearing and I've got new clips from WW. Now I've got to learn how to replace it!

You may recall last fall Chuck Spence stopped by and pointed out to me that before I did anything else with the car, I better straighten out the rear trans carrier bracket and find out "Why it was so*&^% up".
Being a novice, I didn't see it or even appreciate what was wrong. It was as if the whole car was dropped on something with the transmission case taking the brunt of the hit.
Here's what Chuck pointed out to me last year. You can see how the bottom of the carrier bracket between the two big bolts is bent upward. It's supposed to be straight across. You can also see how this caused the two rear rubber mounts to separate from the bolts and housing holding them to the carrier.
You can really see how bent it was here after I got it out.
After I pounded it all back into shape, I thought it would fit no problem, but tonight I encountered this.
I thought the main forks were bent, but I realized even with a pry bar that wan't the case.
I kept measuring, but kept getting frustrated.
After searching the samba, I discovered there is a sequence to follow when tightening down all the bolts on all the mounts. First the front mont bolts get tightened, then the two big main carrier bolts, then the outer two rear mont bolts and lastly the nuts inside the transmission bell housing. When I raised the tranny one inch and followed the tightening procedure, it all came together.
You can see how that carrier is now straight at the bottom.
Here's the new front mount all bolted in and tight.
So I still have to connect the coupler inside the car, but this part all came together tight and fits nice.
Here's a couple Q's for you experts.
I changed the starter bushing and I'm not sure if i have it pounded in right. Does it come back more or sit right here? It's flush on the other side.
Another shot.
I've also got to learn how to replace this throwout bearing. I read a lot of complaints about clips coming loose or people having to add wire to hold them. I'm going to get a new German bearing and I've got new clips from WW. Now I've got to learn how to replace it!

Re: 1957 Oval
It's common to see that bracket bent from guys using floor jacks there to lift the rear of the car up.
Good Job!
Good Job!
Bruce Amacker
'66 Deluxe Bus
'65 Standard Bus
'66 Deluxe Bus
'65 Standard Bus
Re: 1957 Oval
I believe the bushing placement is correct. Some PO probably tried to lift the car by the rear tranny support and bent it!
The throwout bearing clamps are a little tricky, however I don't believe they should give you to much of a prob.
Things look super !! good job man.
I picked up a 61 rag top a few weeks ago so I have another project.
The throwout bearing clamps are a little tricky, however I don't believe they should give you to much of a prob.
Things look super !! good job man.
I picked up a 61 rag top a few weeks ago so I have another project.
_________________
Slayer Out!!!
(Chris C.)
" Marine Sniper - You can run, but you'll just die tired!"
56 Kombi (The Slayer Bus)
65 Sundial Camper
68 Single Cab
03 Passat
Slayer Out!!!
(Chris C.)
" Marine Sniper - You can run, but you'll just die tired!"
56 Kombi (The Slayer Bus)
65 Sundial Camper
68 Single Cab
03 Passat
Re: 1957 Oval
Post some pics of that ragtop! We want to see some California quality!slayer wrote:I believe the bushing placement is correct. Some PO probably tried to lift the car by the rear tranny support and bent it!
The throwout bearing clamps are a little tricky, however I don't believe they should give you to much of a prob.
Things look super !! good job man.
I picked up a 61 rag top a few weeks ago so I have another project.
Got the coupler hooked up. I was worried if it would all fit. No problem, but I still have to clean this area up big time.
So everything looks good so I can move on. Car shifts into all 5 gears. Time will tell if it actually works!
Went over the bottom one more time to be sure it's good to go before I put the wheels back on. But that may be a while since I've still got some brake work to do and other stuff as well.