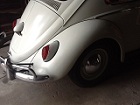
1957 Oval

Re: 1957 Oval
Don't put your wiper arms on until you operate the motor to make sure it "parks" correctly when you turn off the wipers.
Re: 1957 Oval
This may be a stupid question, but how would you know it "parks" correctly?
It's Marla with an " L"
(My list of assets is just too long...)
(My list of assets is just too long...)
Re: 1957 Oval
I'm the only one that asks stupid questions or does stupid stuff on this site.Marla wrote:This may be a stupid question, but how would you know it "parks" correctly?
The answer is in Don West's response to me:
All motors park to the direction the terminals point when mounted,except the oval Beetle. The motor parks to the passenger side of the glass on left hand drive and on right hand drives you can use the motor from a 58-66 beetle and it parks to their passenger side,left hands driver side.
Since I have a left hand drive oval, the wipers should park to the passenger side of the glass. I've got a rebuilt motor on the way and I took Bruce's advice and went through through the backup linkage and now I have a working cleaned up replacement to install when the motor arrives.

Re: 1957 Oval
Photobucket has ruined the first 14 and 1/2 pages of this thread, but that's no excuse for me not having this thing on the road. Josh came over and lent a hand one day. (Much appreciated.) I did the best I could with the motor. Got everything back together and of course it wouldn't start. Clearly, not getting fuel. So I called Bruce. Thankfully, he told me to bring it over. Bruce will update his findings and efforts in the near future.

Re: 1957 Oval
Yes, the Oval has returned. Actually it looks pretty good and Sean (and friends) got a lot accomplished on it since I last saw it.
Well, it looks like it should start but won't. Sean says it sounds like it's not getting fuel, so let's unhook the carb line and nothing comes out. Is there gas in the tank? Sean, you did put fuel in the fuel tank, right? 
After putting fuel in the tank there's still no pump output, so we check that fuel is getting to the pump with a Mityvac jug setup. Yep, the first gulp looked like black coffee but there's fuel getting to the pump, but still no pump output. Probably a good thing as that slug of 20 year old black fuel that was in the fuel line would not have been good for the brand new carb.
So off comes the pump for the first of what would come to pass as multiple rebuilds. 
Let's put the spring back on the correct side of the diaphragm for starters, and assemble the check valves correctly.
While it was on the rack I noticed the trigger wire on the starter was loose to the touch and would fall off in the wind. I'm surprised it was making enough contact to even make the starter work, being that it's 6v.
So we fix 'em up.
The throttle cable was mucked up, too. I see this frequently, especially after the engine weatherstrip has been replaced. You have to take a die grinder and make clearance for the throttle cable and Bowden tube, which this car didn't have from the factory.
It does now.
Adjusting the clutch is a real joy on these old Dubs before they have the wingnut. This is one of those few times where I get out the real wrenches instead of the cheapo ones I usually use. Sure am glad I have these shorties and the GearWrench, it made this much easier. For future reference here's what I used, in addition to a VG:
Let's put the spring back on the correct side of the diaphragm for starters, and assemble the check valves correctly.
While it was on the rack I noticed the trigger wire on the starter was loose to the touch and would fall off in the wind. I'm surprised it was making enough contact to even make the starter work, being that it's 6v.
Adjusting the clutch is a real joy on these old Dubs before they have the wingnut. This is one of those few times where I get out the real wrenches instead of the cheapo ones I usually use. Sure am glad I have these shorties and the GearWrench, it made this much easier. For future reference here's what I used, in addition to a VG:
- Attachments
-
Last edited by Dual Port on Fri Aug 04, 2017 9:00 pm, edited 1 time in total.
Bruce Amacker
'66 Deluxe Bus
'65 Standard Bus
'66 Deluxe Bus
'65 Standard Bus
Re: 1957 Oval
Still struggling with the new LO site 'cause I like to put a lot of pictures in. The site limits you to 12 plus it's easy to get mixed up with the picture numbers.
While I'm messing with that, let's put a clamp on the cable tube to keep the SOB from sliding into the shroud.
Big day yesterday, it went for a road test under it's own power for the first time in decades! That's one happy Irishman there......
But, the MFFP is leaking again after it sets. What is this now, four times?
While I'm messing with that, let's put a clamp on the cable tube to keep the SOB from sliding into the shroud.
Bruce Amacker
'66 Deluxe Bus
'65 Standard Bus
'66 Deluxe Bus
'65 Standard Bus
Re: 1957 Oval
Lets straighten out some wiring. A previous technician installed LED taillights but the wiring could be cleaner.
Let's gut that and start over. Remove the assemblies, bead blast the bracket because it will be the ground now, grind the paint from the inner fender so it makes good contact, and
Solder the wires with shrink tube.
And now it looks nice and is protected. A bit of grease will go on the screws to stop rust.
Lots of electrical doesn't work so one of the first things I do is remove all of the fuses and wire wheel the contacts with a Dremel. Shazam! The wipers "worked" as soon as I did this.
Hey Sean! Someone stole half of your battery!
Hey Ted, what would cause this brake fluid to discolor on a car that hasn't been driven? It's the same fluid in my bus that hasn't changed color at all. I still have some left in the bottle and it looks clear, too.  I put this in 2 years ago when we put on the disc brakes.
Messing with the TS switch right now, and of course the screws were too short and my bolt bin only goes down to 4mm.
I put this in 2 years ago when we put on the disc brakes.
Messing with the TS switch right now, and of course the screws were too short and my bolt bin only goes down to 4mm.  A quick stop at the hardware store got me some 3mmx7mm screws.
Stay tuned, more to come.

Last edited by Dual Port on Sat Aug 05, 2017 4:43 pm, edited 1 time in total.
Bruce Amacker
'66 Deluxe Bus
'65 Standard Bus
'66 Deluxe Bus
'65 Standard Bus
Re: 1957 Oval
I really can't thank Bruce enough for what he's done. I was really frustrated as an amatuer trying to get it to run. I thought I did everytning right. Well, I didn't. He found a lot of little things I didn't do and those little things have a way of making a huge difference in how a vehicle ends up running. I really enjoy interacting and working with Bruce. Its empowering. You learn so much, even if you only pay 1/2 attention to what he's doing. It's a great expereince and Bruce is a great resource. We haven't even solved the fuel pumop problem, but already I think Bruce has taught me more about these early pumps than anyone. I'm sure there will be more to follow.
And with all the set backs I'm feeling really good about a motor I put together (well some of it) that actually runs! And the trans I installed actually works! So I've that going for me. Take the small wins and move on to tomorrow's challenges. Many thanks Bruce!
And with all the set backs I'm feeling really good about a motor I put together (well some of it) that actually runs! And the trans I installed actually works! So I've that going for me.
Re: 1957 Oval
I thought this was the project that would never end. Good work Bruce!
1966 VW 13 Window Deluxe Bus
1974 VW Thing (2)
1977 VW Westfalia
1974 VW Thing (2)
1977 VW Westfalia
Re: 1957 Oval
Don't know what's up wth the fuel pump outlet leaking. Bruce tried a couple combinations of tops. Even after cleaning and refitting,they leaked. We replaced the outlet lines with aftermarket ones from WW. Maybe they're the problem? If so, I found an old one that I cleaned up that I'll take out to Bruce to see if it's the answer.
The oil pressure sensor tested bad. It was a spade model that I had from another old 36HP. I found two really early versions. Both cleaned up nicely, but they are missing the screw that I assume the wire connects to. Since Bruce knows metric screws, I'll bring these out and see if we can get one to work. It seems oil pressure sensors for 36HP engines are hard to find or NLA. Here's a thread on the early oil pressure sensors and a picture of the two I found. https://www.thesamba.com/vw/forum/viewt ... ure+switch