Page 13 of 18

Re: 1957 Oval

Posted: Wed Apr 29, 2015 8:18 pm
by Six Volt
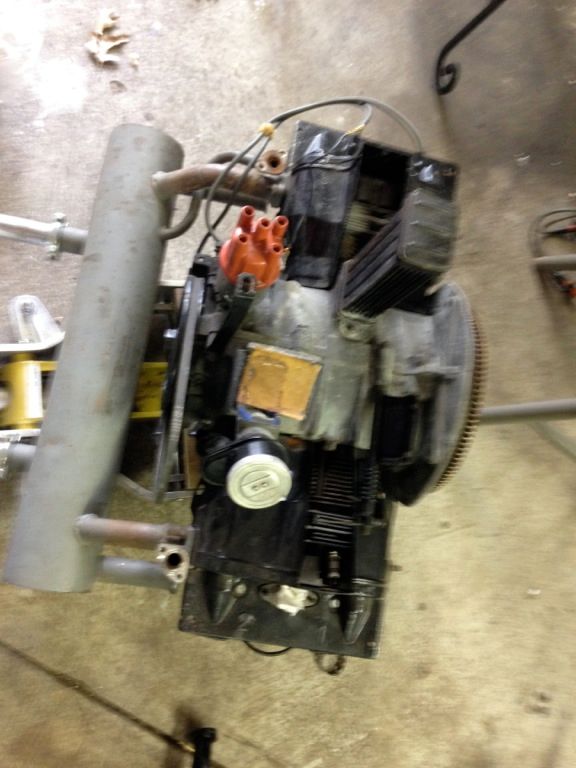
While Bruce is taking care of a whole lot of stuff, I'm working on the engine. I'm sure Aaron is thrilled! :D Its a stock (albeit blury :lol: )36HP
Image

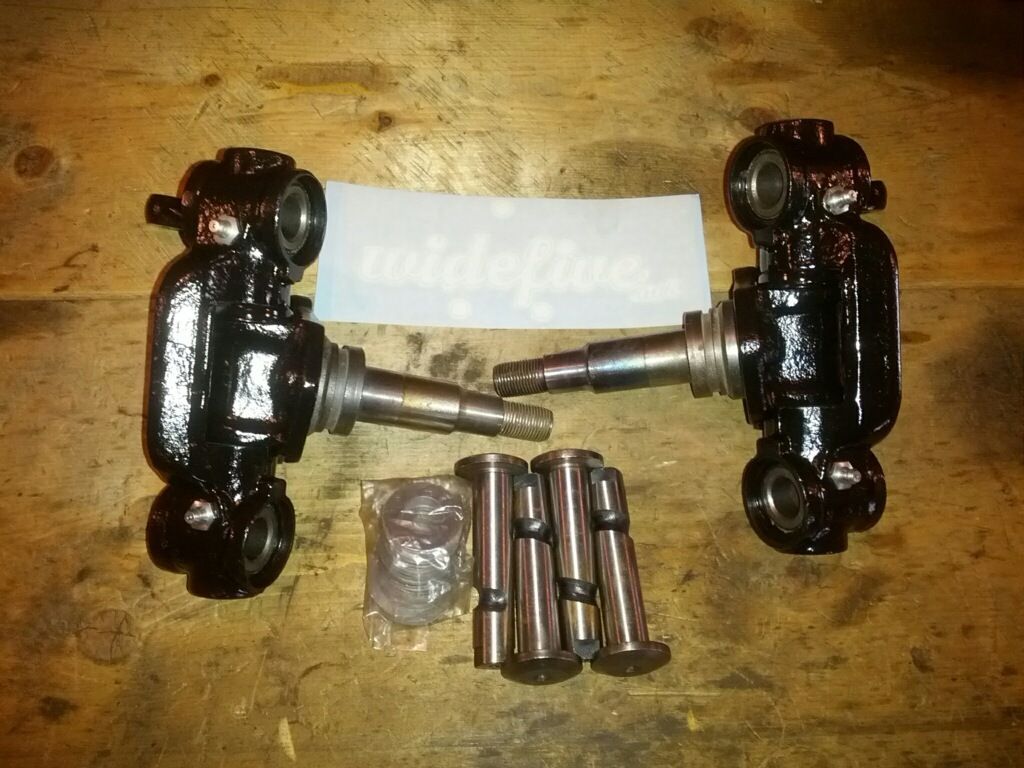
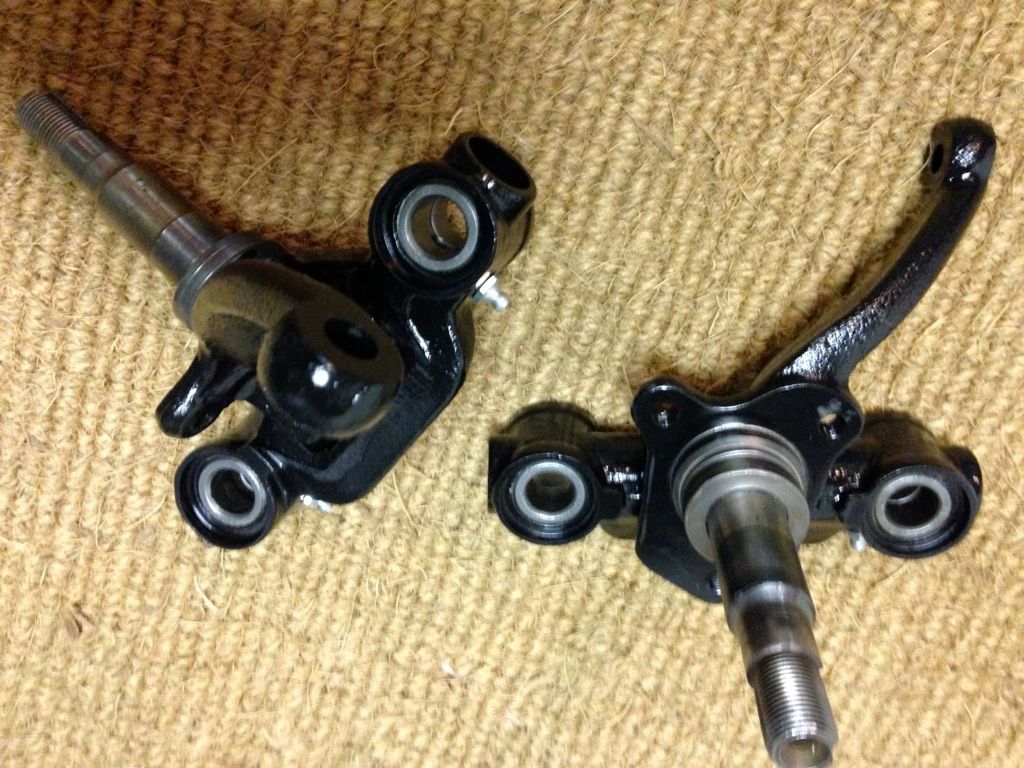
Speaking of Aaron, Dawn and I went out and picked up the spindles. As always, Aaron does awesome work. These things were locked up when we brought them out. Aaron makes 50+ year old crap come out like new.
Image

Image

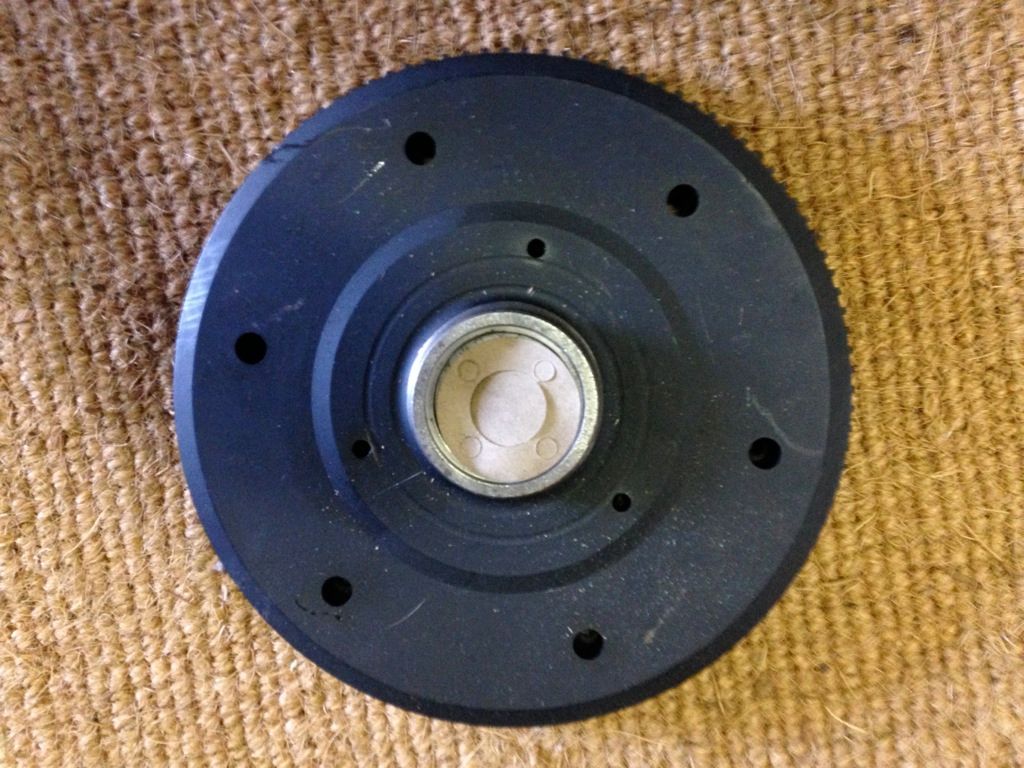
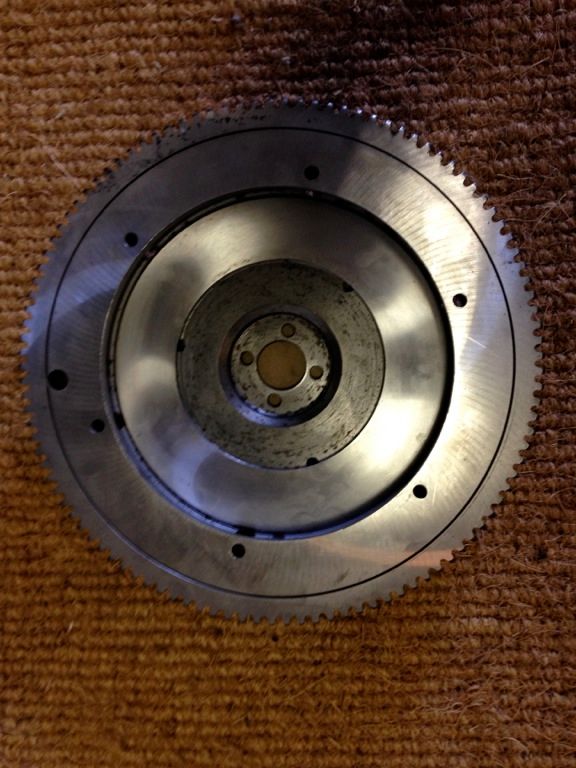
A few years back I picked up some pristine re-done early 6V flywheels (180mm) from Richard Sedoris (RIS) out in Youngstown. No time like now to press one of them into service. RIS does great work (and knows how to acquire stuff from others like him that do!).
Image

Image

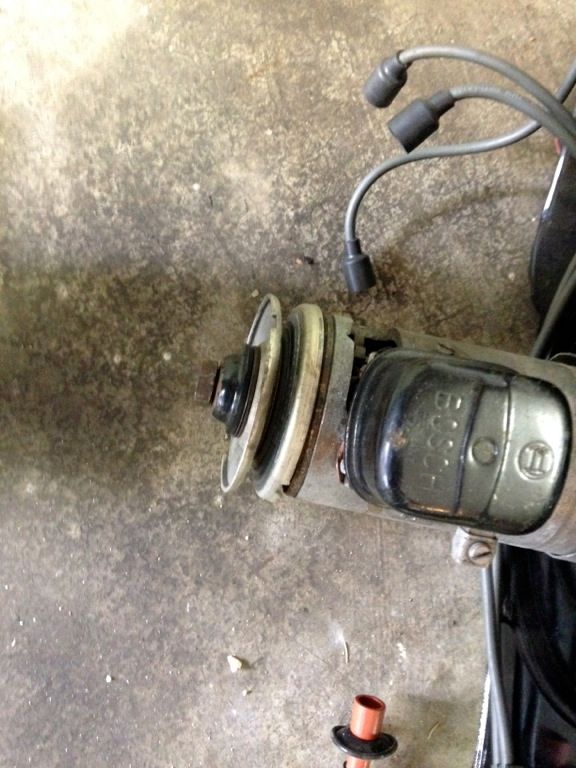
The generator pulley was all wrong on this.
Image

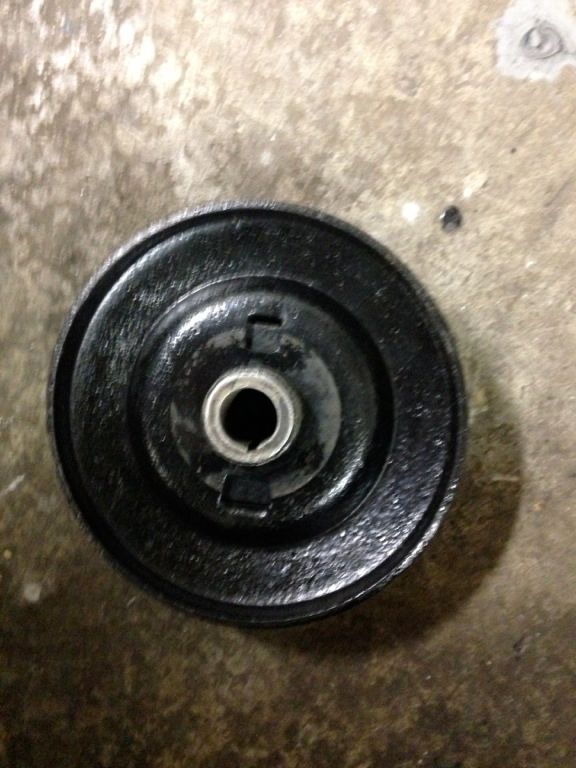
I've got a boatload of correct 36HP ones. So we'll be good to go. Should have Bruce blast this one.
Image

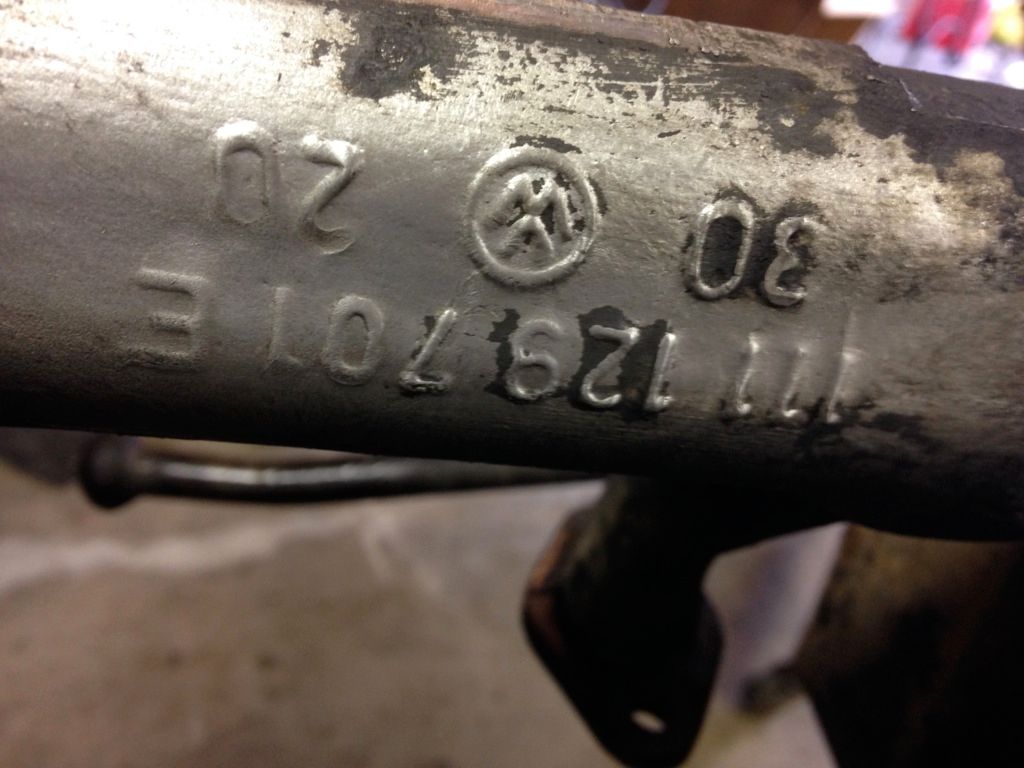
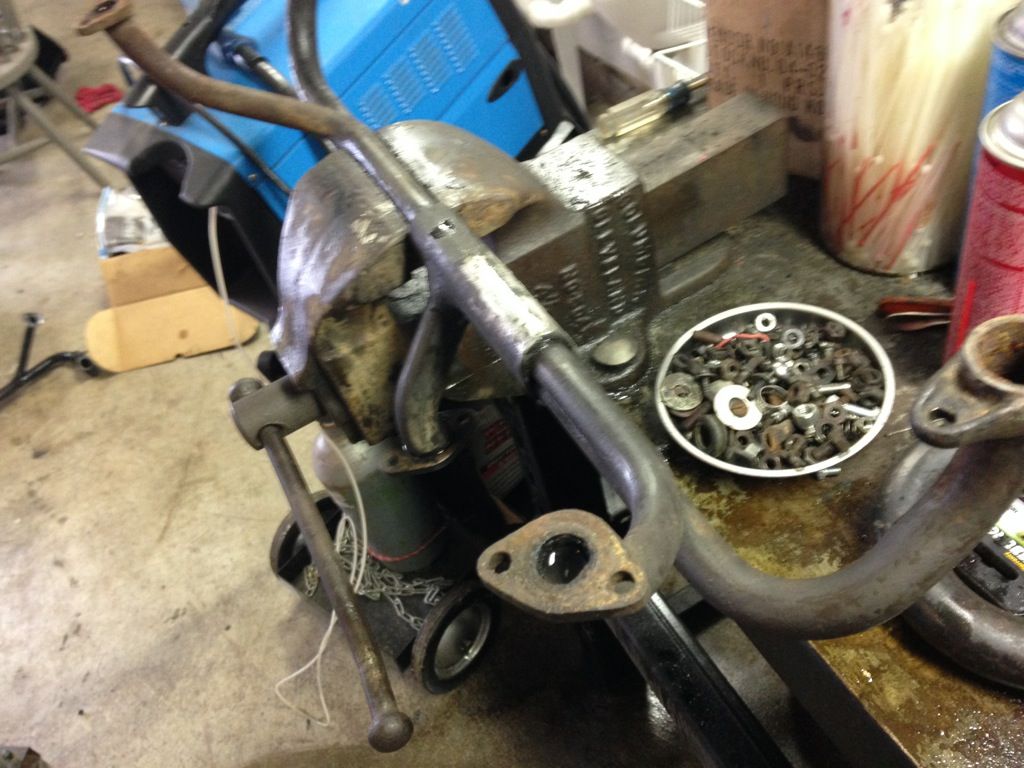
I always like to check the SP manifold heat risers for "clearance". The 701E manifolds are the later (thick walled) manifolds for 36HP.
Image

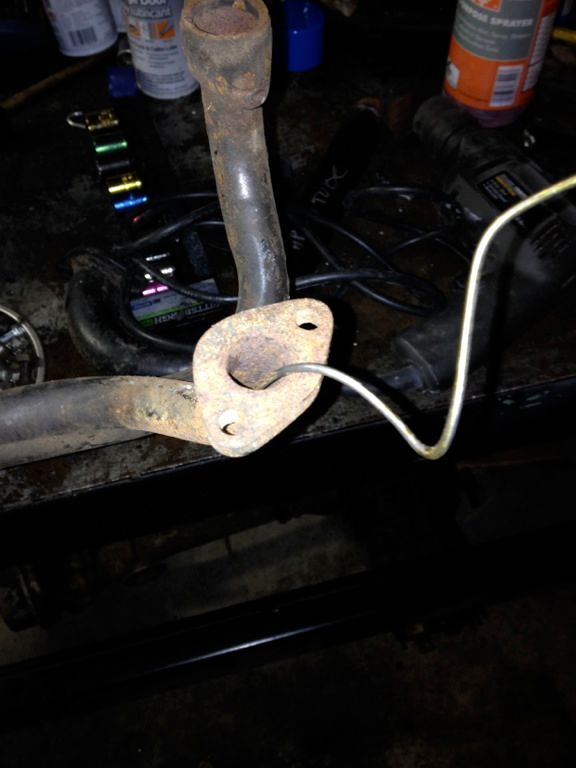
I don't mess with the drill and speedo cable BS that some find successful. I use the "caveman" technique. Coat hanger works best with some apple vinegar for the rust.
Image

Image

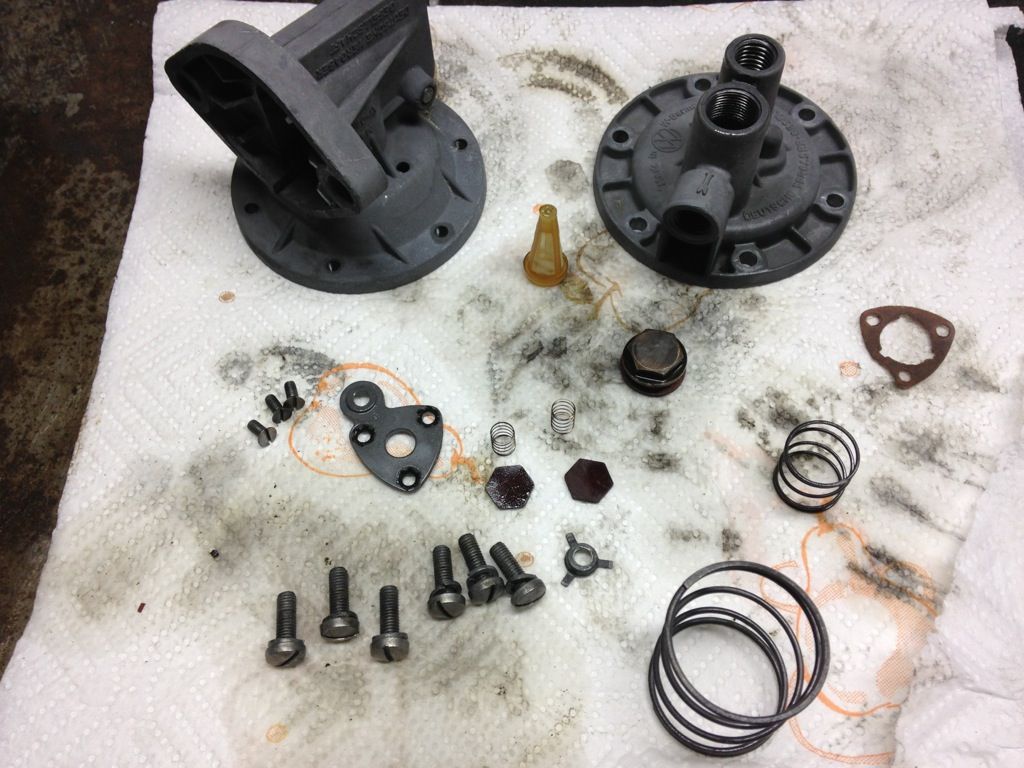
I soaked an original VW 36HP fuel pump. It will be good to go with a WW re-build kit.
Image

Re: 1957 Oval

Posted: Wed May 06, 2015 8:54 pm
by Dual Port
OK, back in town and back on the oval. First, put the suspension stops on. This means use a piece of pipe (and 6V) to hold the upper arm out of the way while I beat the living crap out of the rubber stop with a deadblow hammer to install it. Even with lube it was a fight. :)

Image

W5's spindles look like new, of course.

Image

Count the shims, check the offset again, one side had an 8mm offset and got 6+4, the other side was 7mm and got 5+5+5+5.

Image

The spindles went on like butter, I had already cleaned the holes out with a wire brush chucked in a drill. I did have to put a couple hundred pounds pressure on the lower arm to compress the torsion a bit using a floor jack and piece of pipe.

Image

Image

Adjust the link pin end play, put the bolts in, and torque to 32.

Image

Now the disc brakes. 6V went with AC Industries W5 kit from SoCal Auto Parts. It looks basically good, but time will tell. Everything is made in China. :roll:

First, bolt on the caliper supports. Clean the paint from the caliper support flange so they seat nice and chase the threads to clean the paint from them.

Image

I need longer bolts, good thing I have some nice 10.9 flange head diesel bolts, I just have to shorten them a bit.
Image

They're from an IH DT engine and the spec for them is 46, so that's what they get with red Loctite.

Image

We're going with tapered roller bearings, and IIRC you need to remove a bit from the spindle so they aren't a press fit like the ball bearings were. Some 400 grit and elbow grease removes a thou so the bearings slide onto the spindles nicely. I also used a wire brush in the drill to clean the tierod holes out and the speedo cable hole.
Image

Get a driver that fits the bearing race, clean the hub with a rag, brakeclean, and air.

Image

Drive the race home.

Image

Pack the bearings properly.

Image

Now flip a big install driver over and install the seal.

Image

Image

The directions for the brake install are really mucked up. They say to install the "small pad" inboard, which is the one on the bottom. "Small" pad? WTF? It won't fit in the cal support, and if you look closely at the picture in the directions, they have it the other way around.

Image

All done, and looks great! You see we went with the Allen bolt style bearing adjusters and got rid of the stupid double nuts, and the tierods are on but not adjusted.

Image

Only one problem- the braided brake hoses rub badly on the tierods when the wheel is turned sharply. I sent pics to Steve at SoCal and he's supposed to get back to me. I read about this on Samba and one guy used his old hoses which fit better! I tried an old hose and it DOES fit better, plus I don't trust those "trick braided hoses". We'll see what SoCal says......

Image

Image

Make a new MC pushrod from a nice hard bolt and install it, and adjust properly. The old one was too short, holding on by a single thread!

Image

I started putting the rear shoes on and ran out of time. Stay tuned!

:mrgreen:

Re: 1957 Oval

Posted: Wed May 06, 2015 10:27 pm
by Six Volt
I can't thank Bruce enough for taking on this challenge. It is (quite obviously) out of my league. It's kind of interesting seeing him deal with an aftermarket disc brake set up for a 58 year old car that doesn't quite meet the definition of "bolt on". Thankfully, Bruce has the experience and competence to improvise and (hopefully) make it work. I picked this disc brake set up ( from AC Industries and So Cal Imports) because they advertised it as a bolt on "zero" offset. The offset may well end up being zero, but nothing else has proven true. Nevertheless, thanks to Bruce's competence, this project may find its way out of the woods. I'm really impressed by Bruce's attention to detail. We're still working through some issues on parts for the pre-58 rear brake parts, but that's a story for another day!

This project is also taking me back to my youth and a time where we actually made stuff in America. Nothing against quality made foreign stuff, but someday energy and transportation costs may require a return to American manufacturing. I'm optimistically hoping when that happens we won't see the problems Bruce is encountering on this install. Time will tell.

Re: 1957 Oval

Posted: Thu May 07, 2015 10:32 pm
by Dual Port
6V's tranny ground had the wrong end on it, but we have the technology. I had already bead blasted the strap, but I also wirewheeled where the end goes on....

Image

My big crimper hasn't seen much action since I sold the truck shop.

Image

Image

I cleaned the shit out of the stud and tranny area spotless, and bead blasted the (odd) 14mm hex nut that goes on the trans.
Image

Image

How to pack a wheel bearing with grease:

Image

Checking brake pedal freeplay (adjusting the MC pushrod):

Image

Re: 1957 Oval

Posted: Fri May 08, 2015 12:29 am
by SlashKirk
Dual Port wrote: How to pack a wheel bearing with grease:

Image
Packing bearings while rocking out to Nirvana!!

Re: 1957 Oval

Posted: Fri May 08, 2015 6:54 am
by Mike Kever Kombi
Videos are a good idea, perhaps next time you can upload to YouTube somthey can be embedded? Every time o click to watch videos in photobucket, I get blown up with pop ups, couldn't watch either vid

Re: 1957 Oval

Posted: Fri May 08, 2015 7:16 am
by toolbox
That is one sketchy brake hose routing! I do not understand how people can sell that crap and sleep at night. The caliper is most likely threaded 10x1.0mm and I would have a hose made the fit the 10mm euro bubble flare w/retainer clip on the body side with a 10mm banjo on the caliper end and use that.

Re: 1957 Oval

Posted: Fri May 08, 2015 9:37 am
by Dual Port
toolbox wrote:The caliper is most likely threaded 10x1.0mm and I would have a hose made the fit the 10mm euro bubble flare w/retainer clip on the body side with a 10mm banjo on the caliper end and use that.
I was thinking the same thing yesterday but I forgot to check and see if the flange is machined for a copper banjo ring. In the pics it looks like it is. You probably don't need to make one, if you go through the Napa catalog I'm sure there's already one in production that's the right length.

Re: 1957 Oval

Posted: Fri May 08, 2015 9:52 am
by toolbox
Dual Port wrote:
toolbox wrote:The caliper is most likely threaded 10x1.0mm and I would have a hose made the fit the 10mm euro bubble flare w/retainer clip on the body side with a 10mm banjo on the caliper end and use that.
I was thinking the same thing yesterday but I forgot to check and see if the flange is machined for a copper banjo ring. In the pics it looks like it is. You probably don't need to make one, if you go through the Napa catalog I'm sure there's already one in production that's the right length.

I have a shop that I use for my test stand hoses that is DOT certified for building brake hoses. I call it in and it is ready for pickup by the time I get there, NAPA is usually a day or two away.

Re: 1957 Oval

Posted: Fri May 08, 2015 1:59 pm
by Dual Port
toolbox wrote: NAPA is usually a day or two away.
A day or two on this car is quick! Most of the parts are special because it's a '57 and hard to get, 1-2 days I'm fine with. This is a spare time project for me with no real hurry like your work projects are.

:mrgreen: