Super Convertible

User avatar
Dual Port
Posts: 1306
Joined: Fri Apr 30, 2010 10:06 am

Re: Super Convertible

Post by Dual Port »

Brakes are done, time to focus on engine stuff and fuel system. The engine was really grimy, time for some engine degreaser and a power wash. I stripped the peripherals off the engine and washed it with degreaser and a solvent brush:

Image

Push it outside and hit it with the power washer. Mind you, it was 28 degrees and the garden hose was frozen, along with me when I was done. I have plastic cork assortments so I corked all of the holes first.

Image

Brought it inside and blew off the water. Looks much better now! Oh yea, I put the phukking bolts in the alt shroud the previous butcher left out. :roll:

Image


Nick went to Lurch's and picked up the fuel tank, it looks perfect inside.


Image


Rinsed out the fuel tank:
Image

Installed the new sender:

Image

Prepped the tank mount:
Image

Installed new foam stripping to quiet noise:

Image

Installed the tank, route the fuel line underneath with a new filter:

Image

5 hours today, 32.75 so far. Next- change muffler, detail engine compartment and paint, install tune-up parts, and wait for the new carb to show up. I'm thinking RT as soon as the carb is here.
Bruce Amacker
'66 Deluxe Bus
'65 Standard Bus
User avatar
NIKLES1974
Posts: 38
Joined: Fri Aug 22, 2014 10:12 pm

Re: Super Convertible

Post by NIKLES1974 »

DAMN THING IS ALL FROZE UP - - - - - NICHOLAS ! ! ! - - NICK, DAMMIT NICK STOP HIDING IN THAT WARM GARAGE, GET OUT HERE AND GIVE ME SOME HELP ! !
Attachments
FUEL & CLEAN UP 005.JPG
NICHOLAS ALLCAPS
1974 BRILLIANT ORANGE SUPER BEETLE CONVERTIBLE
ALLCAPS IS MY FONT !
User avatar
Dual Port
Posts: 1306
Joined: Fri Apr 30, 2010 10:06 am

Re: Super Convertible

Post by Dual Port »

I changed the muffler, most nuts had to be torched loose. I chased the threads on the head studs with a die and cleaned everything with a wire wheel, it looked great when clean. While the rear shroud was out it got a coat of paint.

Image

Image


I adjusted the valves, they were all loose by several thou. I forgot to take a pic of the new muffler but you can see a bit of it here.

Image

Surprise! A new head on the left side. It's clean and a different PN than the right head- not a big deal but the Samba guys mention a step in the combustion chamber that changed CR. I wonder if the CR is different on the left head than the right? :roll:

Image


I beadblasted and painted the valve covers while they were off, and installed them with silicone gaskets. The left head has a cast VCG surface which is weird- all VW heads I can remember have a machined surface..

Image


I removed the shifter, cleaned and repainted the shift lever.

Image

Checked the front shift bushing and regreased it, it was tight.

Image

I figured I'd check the rear coupler and pulled the inspection cover. I could phukking strangle the SOB that did this- he put about almost a quart of wheel bearing grease in/on/under the shift coupler. When we first racked this car I noticed that the the "duck bill" drain on the bottom of the tunnel was rotted from grease and grease was dripping out. I pointed it out to Nick and said that was weird.

Image

Not only do you not need grease here, it wrecks the rubber bushings in the coupler because they're rubber and not neoprene. This guy needs a lesson about rubber, neoprene, and petroleum products.

Image


Cleaning this old stinky grease out was a mess- not only was it hard to get to, but there's a bunch of sharp edges in there which cut the hell out of my hands. :evil:

Image

Luckily I had a pair of new bushings on hand so I cleaned everything and put the new bushings in. This is what it's supposed to look like when done. I forgot to take a picture of the 40a MaxiFuse, it's just in the lower corner of the picture. This protects the main feed that goes to the dash and everything, VW "forgot" to put protection on this circuit like every other automaker does.

Image

Right heater cable tube was rotted off at the end, I cut it shorter to find it clogged solid with rust.

Image


Here's the heater cable after- tube shortened, reamed with a drill and wire brush, blown out, greased, new condom installed, I happened to have one on hand.
Image

New left cable, freed up the heater flap valves. I checked the heater ducts with a mirror and flashlight, they're clean, no critters.

Image


More critters...

Image

Here's where we sit right now- I stripped the engine bay, cleaned and painted everything separately. I wirewheeled the aluminum castings, they shine like chrome. I cleaned the orange overspray off the diag connector and other items. I masked off the engine bay and painted the noise insulation and sheetmetal. The entire engine bay is cleaned, detailed, painted, and cleared. I used high temp on the heat riser tubes. I replaced the vacuum hoses and even put the stupid RPM/timing sensor thing back on #1 plug wire that goes to the diag connector (never to be used again in a million years) I set the old carb on there to support the air cleaner for mockup, we're waiting on a new carb and then we can run/drive it. I put 5 gallons of gas in the tank and sucked fuel through from the back to flush out anything that was in the new lines or pump. (I had already flushed the main steel line with carb clean and air).

Image

Mon 11/17 4.75 hours. Replace muffler, heat nuts, chase threads, clean parts, coil, bracket, paint engine compartment, parts- coil, bracket, air cleaner, etc, install fuel pump, lines, clean distributor, install points and condenser, test advances.

Tues 11/18 3.25 hours Install plug wires, vacuum hoses, detail engine, locate and install extra shims for fan belt, install dist, coil, shorten dist wire. Adjust valves, blast and paint valve covers, replace heater cable, free up heater cable adj clamps, install fuel line, mask and paint engine surround, clean misc engine bay.

Wed 11/19 3 hrs Install valve covers, fab heater cable connection strap, install MaxiFuse in main power feed, clean grease from shifter coupler area, install heater tubes, repair fuel filler area.

Thurs 11-20 2.25 hours Remove, clean, paint shifter, fill fuel tank, bleed/flush fuel system, check for leaks, replace shifter bushings, lube front shifter bushing.

46 hours so far.

I drove both my Ghia and bus yesterday because it was dry and I needed to switch them- one was at home and the other at the shop. I don't think we'll be doing any driving today, got some snow and school's called off....... :(
Bruce Amacker
'66 Deluxe Bus
'65 Standard Bus
User avatar
Dual Port
Posts: 1306
Joined: Fri Apr 30, 2010 10:06 am

Re: Super Convertible

Post by Dual Port »

Put the Chinese carb on, and amazingly, it runs great! Put heat shrink on the choke/idle solenoid spades so if they fall off they won't burn up the iggy switch. :roll:

Image

Engine compartment, detailed.
Image

I drove it 20 miles yesterday and it ran and drove really well. The heater will broil you out of the car (35F ambient), the car tracks well in spite of flat spotted tires, runs great, stops fairly well. The pedal is high and hard but the shoes need to seat in a bit more. The gas gauge is a bit funky- with 5 gals it read under 1/4, with 9 gallons it read between 1/4 and 1/2 and moved around slowly while driving. Chassis feels good, struts/shocks feel good, handles well, etc. Nick has 4 new tires/wheels that I suggested he install.

Nick picked it up and took it home today, one happy camper!
Image

Image
11-24 4.25 hours Install carb, set ignition timing, record toe setting, install 2 new tie rod assys, set toe to previous setting, remove bad steering damper, install tailpipes, torque axle nuts and install cotter pins, install brakelight switches, brake lights now work.

11-25 2.25 hours Grind out fiberglass on fuel filler neck area and prime, blast fuel filler neck and fuel cap, install fuel filler neck, adjust brakes twice (before and after RT), road test 20 miles (off clock), adj parking brake, adjust carb idle and mix, install air filter assy.

11-26 1 hour Install steering damper, clean battery tray and install battery hold down, misc detail.

Total to date, 53.5 hours

It's gone! I gave it back to Nick for a couple of weeks to get re-acquainted with the car. We'll probably start on the bodywork after a few weeks.....

:mrgreen:
Last edited by Dual Port on Wed Nov 26, 2014 9:43 pm, edited 1 time in total.
Bruce Amacker
'66 Deluxe Bus
'65 Standard Bus
User avatar
Marla
Posts: 1536
Joined: Tue Aug 20, 2013 7:14 am

Re: Super Convertible

Post by Marla »

Looks like you got a real happy camper there! Good job
It's Marla with an " L"
(My list of assets is just too long...)
User avatar
NIKLES1974
Posts: 38
Joined: Fri Aug 22, 2014 10:12 pm

Re: Super Convertible

Post by NIKLES1974 »

I PUT ON MY NEW RIMS AND TIRES LAST WEEK AND HAVE BEEN DRIVING WHEN ITS BEEN WARM ENOUGH TO HAVE THE TOP DOWN. THE CAR HAS REALLY BEEN A BLESSING FOR ME NOW THAT I HAVE TIME TO ENJOY IT. DUEL PORT GOT THE VW RUNNING HOW I REMEMBER IT (LIKE NEW). TODAY MY FRIEND BOB AND I GAVE IT A BASIC CLEAN UP AND IT LOOKS PRETTY GOOD. I'M STILL TRYING TO FIGURE OUT WHAT TO DO WITH BODY AND PAINT WORK, STARTING TO TALK TO MORE PEOPLE, ASKING FOR ADVISE AND LEARNING ABOUT THE DIFFERENT WAYS OF GOING ABOUT THINGS. I'M GOING TO GO ON MY FIRST CRUISE (METRO PARKS) AND HOPE TO SEE A LOT OF YOU AND YOUR CARS AND BUSES THEN.
FIRST INTERIOR CLEAN UP AT BOB'S 001.JPG
FIRST INTERIOR CLEAN UP AT BOB'S 004.JPG
FIRST INTERIOR CLEAN UP AT BOB'S 008.JPG
FIRST INTERIOR CLEAN UP AT BOB'S 011.JPG
NICHOLAS ALLCAPS
1974 BRILLIANT ORANGE SUPER BEETLE CONVERTIBLE
ALLCAPS IS MY FONT !
User avatar
Marla
Posts: 1536
Joined: Tue Aug 20, 2013 7:14 am

Re: Super Convertible

Post by Marla »

Looks great!
It's Marla with an " L"
(My list of assets is just too long...)
User avatar
Dual Port
Posts: 1306
Joined: Fri Apr 30, 2010 10:06 am

Re: Super Convertible

Post by Dual Port »

Nick's aftermarket fuel sender was seeping from the o-ring, on a Beetle this is a 5 minute job but on a SB you have to pull the frigging tank out because the wiper motor box overhangs the sender too much.

Image


It seemed like the sender didn't clamp the o-ring hard enough so I used a Channellocks to make it a bit tighter and replaced the o-ring.

Image

The FF had grunge in it so I changed that while it was out.

Image

I also adjusted one valve that had loosened up, #1 exhaust.

Fingers crossed!

:mrgreen:
Bruce Amacker
'66 Deluxe Bus
'65 Standard Bus
User avatar
NIKLES1974
Posts: 38
Joined: Fri Aug 22, 2014 10:12 pm

Re: Super Convertible

Post by NIKLES1974 »

HARD TO THINK ITS BEEN ALMOST ONE YEAR GONE BY AND THE VW HAS GONE FROM THIS
74 VW 001.JPG
TO THIS
PUT THE BRA BACK ON 003.JPG
PUT THE BRA BACK ON 009.JPG
PUT THE BRA BACK ON 012.JPG
PUT THE BRA BACK ON 014.JPG
THANK YOU AGAIN TO DUEL PORT FOR ALL HIS HELP AND THANK YOU TO ALL THE LEAK OIL MEMBERS WHO I'VE BEEN ABLE TO MEET AND SPEAK WITH SO FAR. HOPE TO SEE YOU ALL AT THE NEXT EVENTS.
gladysanim.gif
gladysanim.gif (27.81 KiB) Viewed 2053 times
NICHOLAS ALLCAPS
1974 BRILLIANT ORANGE SUPER BEETLE CONVERTIBLE
ALLCAPS IS MY FONT !
Six Volt
Posts: 3724
Joined: Mon Dec 15, 2008 7:25 am

Re: Super Convertible

Post by Six Volt »

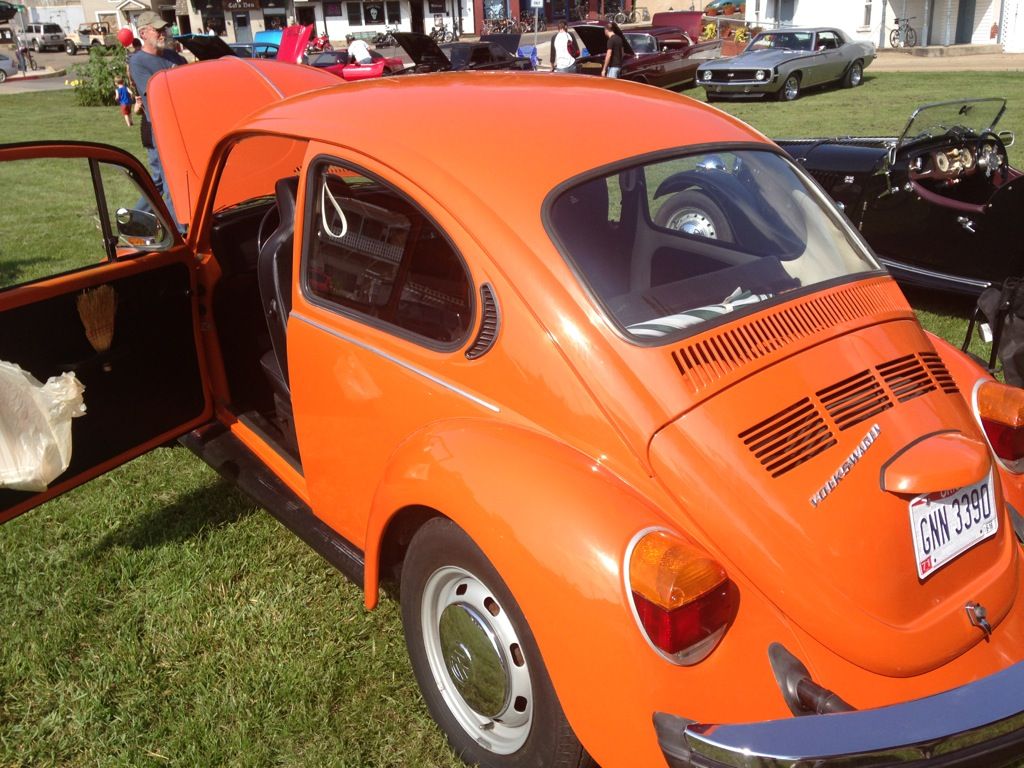
Your bug looks great. I saw this '74 hardtop in Athens Friday. Nice original. The guy needs to put the chrome inserts back into the window rubber, but that's nitpicking. Car was clean. Reminded me of yours.

Image
Post Reply