Six Volt wrote: ↑Sat Jan 07, 2017 12:34 am Great stuff Bruce. Really appreciate the attention to detail and the time it takes to document and share a project like this. Many thanks.
On another note, I must be a horrible witness as I have no recollection of the welder you're using. Is it a Lincoln or a Miller or something else? Also, if you can share, what settings do you generally use for cargo floor welds/rockers? Do you just "play it by ear", or do you have specific settings you use for specific welds? Can you share how you set up welding? I'd like to get better at welding (hell, I'd like to get better at everything) and this kind of project intimidates amateurs. And as you know, I'm an amateur!
I started the last bus with a small Lincoln but it wasn’t getting the job done. Miller is one of the best names in the welding field so I got lucky and stumbled on a MillerMatic 135 110v mig welder and have loved it ever since. I use a standard 75/25 mix of argon and CO2 and .024” wire.
On the inside lid there is a factory “cheat sheet” on what settings to use with the size of wire and material which I’ve found to be pretty good so I just stick with these. You can see I have the heat on 3 and the wire speed on 45 for 20 ga sheetmetal.
Sheetmetal is the worst thing to weld anyway so getting a high quality welder was a big step up, years ago I had a Snap-On YA212 mig which was great then, but when I sold the shop all equipment went with it. Now I find myself buying all the shop equipment I sold with the business.
To answer L’s question, weld through primer is just that- primer that you apply to bare metal and then weld over to protect metal that would otherwise be bare and buried where you can’t paint it when done. It’s self-etching to be applied over bare metal and prevent rust. There are conflicting opinions on this stuff, but it beats nothing. I use the expensive stuff from the bodyshop store, it’s like $14/can. It has a ton of pigment, unlike most rattle cans that are 95% thinner.
I’ve been kind of busy with work crap, like writing two new classes. For you techheads you might get a kick out of this- I built 5 demo boxes to use in class that consist of a late Powerstroke 6.7 ECM, power supply, and 2 DLC connectors for scan tools. This will let us have 10 (5x2) live Ford IDS scan tool setups in class for teaching how to use the software. It was fun to build these but it took waaay longer than I thought it would.
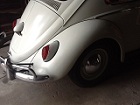
Anyway, back to the bus. The RR corner was next and it was crumpled up from a light hit. My gut instinct is to not cut the crumpled metal off, I generally straighten it back to near-correct before cutting so I don’t get too much going on at one time. So I took my monster wire wheel/bondo/flesh remover and took off all of the bondo, which takes about 30 seconds. Then I hammer and dollied out the crumpled metal until it resembled the correct profile.
I then cut the wasted portion of the metal away and started eyeballing the new panel, which was the curved section and not the flange next to the engine lid.
I cut reliefs in the edge of the metal and folded them over to create the curved flange needed. I put a piece of I-beam in the vise and clamped a hunk of angle to it to create my hillbilly brake.
About this time I realized I needed to have the engine lid and rear apron in place to get my gaps right. Both were somewhat mangled and took some time with a hammer, dolly, and long I-beam to make them usable again. When I went to mount the engine lid a previous “tech” had broken both screws off in the nut plate. I intended to get these out with the welder so I sandblasted them to get a good weld started.
]
When I hit the welder trigger the wire would just bounce off of the bolts! Both had no continuity to ground, even though they were frozen in place. Rust, ugh. Using a DVOM one had 10KΩ resistance and the other was infinite. This require me to cut open the back side of the hinge panel to access the nut plate.
From there it was easy, glow it, remove the stubs, chase the threads, straighten it, and reinsert it.
It also need some hammer/dolly work where the “tech” tugged and twisted the engine lid in anger trying to get it free. This guy did a shitty job of drilling out the hinges, too, which required me to re-do his work. That meant glowing the hinge, removing the pins, brazing the hole up to fix his sloppy work, and drilling it back to correct size with new .225” stock as a pin in the drill press.
A dot of braze keeps the pin from walking out.
Oh well, it’s now back on, works well and has good gaps.
Here I’m test fitting the piece, the big flange in the foreground was also mangled pretty good so I glowed it, straightened it, and welded it back where it belonged.
Here the corner is tacked in with the lid and valance showing the gaps are good. No overlaps here, those panels are butted with zero clearance.
Welding….
Fully welded and rough ground, nice gaps.
Here you can see the relief cuts welded together. A bit more finish work and this won’t be visible at all.
Here I’ve put the battery tray in, the ugly welds in the background look like the tray but they’re actually the inside of the corner welds. The far edge of the tray was welded from underneath.
The left valance bracket also had a broken 8mm bolt with no continuity. I drilled a hole in it, glowed it, and quickly stuck an easy-out in it to extract the broken bolt. This is one of the few times an easy-out can actually work.
Next is the spare tire holder.