Step one in wiring the dash is to install sound deadener in that area, since once the harness is in there's no easy way to get behind it. Here's some Fatmat stuck in place to keep the noise down. It does a really good job, as the bus has about a hundred miles on it right now and it's very quiet in spite of not having any weatherstripping on the doors yet!
I don't like the way VW runs the power lead to the fusebox, then to the HL sw, then finally to the ig switch. I soldered a three way split into the wires so each of those items is fed directly from the 10ga feed wire and put heat shrink tube over it. Remember this feed has a 40amp MaxiFuse in it for protection in the back of the bus.
This now feeds the ig switch directly. I put heat shrink over a lot of the factory terminals and use almost all sealed connectors even though they're not exposed to the weather. The shrink connectors give a much better mechanical connection resistant to vibration. The fuseboxes (yes, two) are installed but completely detailed yet. I'll shoot better pics once it's done and put them up. It looks kind of crappy right now (you'll remember from Bill's pics with the test light
I bought a good used fuel gauge off of Samba, buffed it, and installed it. Gas guage works!
Popout prep and install took a lot of my time over the last couple of weeks. They are kind of a PITA to assemble and install, but that's cause I'm a diesel engine guy and not a body/glass/interior kind of guy.
Here I'm painting the frames with the same PPG paint I shot the upper part of the bus with. That's a Parma Spray Booth ducted outside with an exhaust fan.
Getting ready to assemble, it's pretty straight forward. I just don't like doing it. I cleaned the glass per Lurch's advice with (???) glass cleaner (no ammonia) and 0000 steel wool. I then ran the buffer over them (the big one that I buff the paint with) with some fine compound, you can feel a big difference between buffed and unbuffed glass with your fingers.
Assembling the glass to the frames went really easy- no clamps needed, just Windex and light muscle. The Samba powdercoat gang has to use massive clamps and BS to get the screw holes to align. Me? Push it together with Windex and the screw holes lined right up. No grief at all. I used several old frames and two new aftermarket frames, which fit nearly 100% perfectly. I'm amazed at how good of quality they were. If your frames are rusty don't even bother cleaning them, for $35 you get a new one. I couldn't even tell which was which except the hinge-to-frame threaded holes were just a bit sloppier and I stripped one out with light torque from a screwdriver.
Putting in the outer seal in the frame was easy, but a plastic gasket scraper made it easier. The screw holes visible just under the scraper are the ones that were just a bit sloppier than OEG. Once again, Windex was my only lube. (as Lurch cringes....) From here it's just a matter of pushing the assy into the bus and screwing in the screws. A little kid could do it.
Here I'm fixing the rotted sockets in the taillight housings, I used Napa PN 787146 which is a universal 3 wire taillight socket for an 1157 bulb. It has its own ground wire so you don't have to worry about socket-to-housing-to-body continuity for ground. Put it together and screw the ground wire to the body in a normal way. The only thing is it's about 1/4" larger so you have to drill/file/hog/ or use whatever tool of destruction you prefer to open the hole up a bit. I used a drill press.
Once the socket is installed, the little tabs are bent over to lock it into the housing.
OK, the socket is in but the chrome is icky that reflects the light. No trouble, use the tried and true hillbilly method of gluing aluminum foil in place with spray glue.
Then trim off the excess with a razor knife.
Once done, the foil works great and the lights are nice and bright. Sean followed me today, he can probably agree. In the background you can see the front turn signal bulb holders with which I did exactly the same thing. Bead blast, glue, foil, new lenses, install. The sockets on the front ones were fine, requiring no repair. All four are nice and bright.
The buffing wheel came in handy for dozens of small parts. Switch bezels, light bezels, even the taillight lenses responded greatly to a spin on the wheel.
Here's half of a lens done showing the difference between old and new. Amazing!
Bill's interior work is EXCELLENT! He fabbed up these "seat stand covers" where the stands would normally have painted metal looking at you.
Probably 875 hours right now. Still to come in no particular order:
Front window frame refurb and paint
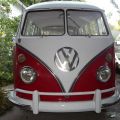
Front and rear bumpers
Spare tire, jack etc.
Install all weatherstripping
Headlight assy refurb
Interior light assys
Detail fusebox area, mount TS flasher, modify and install front kick panels
Front door panels
All Deluxe exterior trim- straighten, wetsand, polish, install. (Ugh! Not more bodywork?!)
Steering wheel refurb
Finish carpet padding, install rear seat.
Finish popout latches and some of the inside popout rubbers.
Oh, yea, and don't forget the phucking tranny.